RaspberryPi home automation gateway – Hardware and Demo

UPDATE: An updated version of this gateway install guide is published here. The rest of this post is kept here for legacy purposes, some links to source files might be obsolete or not work any longer, please see the linked guide above for the latest code and walkthrough.

In this last part of the RaspberyPi home automation gateway series I will show an example of hardware implementation that talks to the RaspberryPi secured realtime home automation gateway, and share the firmware source code.

GarageMote is a garage door controller shield that can be used to remotely control a garage door from anywhere on the web or from your smartphone.

GarageMote was created for several reasons. Mainly because as I’m adding more Moteino based home automation devices around my property, one of the nice things I wanted to be able to do is control the garage door remotely. It’s become so routine to close the garage door when I leave from home that sometimes when I’m already 5 or 10 minutes away I wonder if I actually closed it. And so I want to be able to check the door status and close it if it was left open by mistake, without having to drive back home. Or maybe it’s useful to be able to let someone in without giving them the garage code every time.

Continue reading

RaspberryPi home automation gateway – Approach

In the previous part of this post I described the conceptual high altitude picture of a secured, realtime home automation gateway. In this part I will go into more detail and show some of the issues I’ve faced and and solutions to address them.

First, the webserver had to be put behind a mandatory SSL connection. All incoming HTTP port 80 traffic would be permanently redirected to secure sockets layer port 443. That was pretty easy with a self signed SSL certificate and some webserver configuration. Then HTTP basic authentication was put in place so that users would first need to be authenticated before web access would be granted. Again, not too complicated, using a .htaccess file and some changes in the webserver config file. Custom authentication can also be implemented, but for the purpose of this tutorial basic auth is good enough.

Now to the harder part. I wanted the websocket server as a separate entity from the main webserver. Several reasons for that, but mainly because of scaling and I like to keep separation of concerns and have a modular design. That exposes several issues. Continue reading

RaspberryPi home automation gateway – Intro

The title is actually incomplete but didn’t want to make it too long. What I’m about to describe is an initiative on how to put together an encrypted, authenticated, realtime, RaspberryPi powered home automation gateway. It will be a few separate posts that will go from concept to implementation, using a real world example of how to control something in the house. I’ll break it down and explain the big picture and each part that needs to be addressed. But first, a little more background and reasoning behind this effort.

My makeshift home automation gateway

Above you can see my temporary gateway setup. It’s very simple – I have a RaspberryPi powered through an ATXRaspi, and a Moteino which acts as the gateway to my wirelessly controlled house. It’s hard wired to my home router because the wireless adapters are simply junk, not reliable. Also hooked up to a monitor and keyboard.

I’ve seen tons of blogging and articles on how to make something blink, turn a servo or LED on, even do more real things like turn ON lights, change the thermostat or control some household appliance, from your smart phone. All cool and dandy. But almost everyone seems to completely skip security. The blog posts end when the LED or light turns on, and everyone seems to be super excited about the cool thing they just did. But I’m left there with a raised eyebrow wondering if those people know what they are doing. Security is of major concern to me because if I hook up my garage doors, lights and perhaps other appliances to the interwebs, I don’t want unauthorized access. Is that a nobrainer or am I paranoid? Continue reading

Sump pump alert with Moteino & HC-SR04

UPDATE: This project has been replaced/updated with SonarMote. See this blog post for a more rencent implementation of what you see here. The alerts are now implemented as simple events on the Moteino Gateway.

Here’s another project I wanted to do for a long time. I wanted a sump pump flood warning alert system in place, for peace of mind when I’m gone from home for prolonged periods. For whatever reason I thought this was going to be more difficult but no, it’s almost as easy as pie!

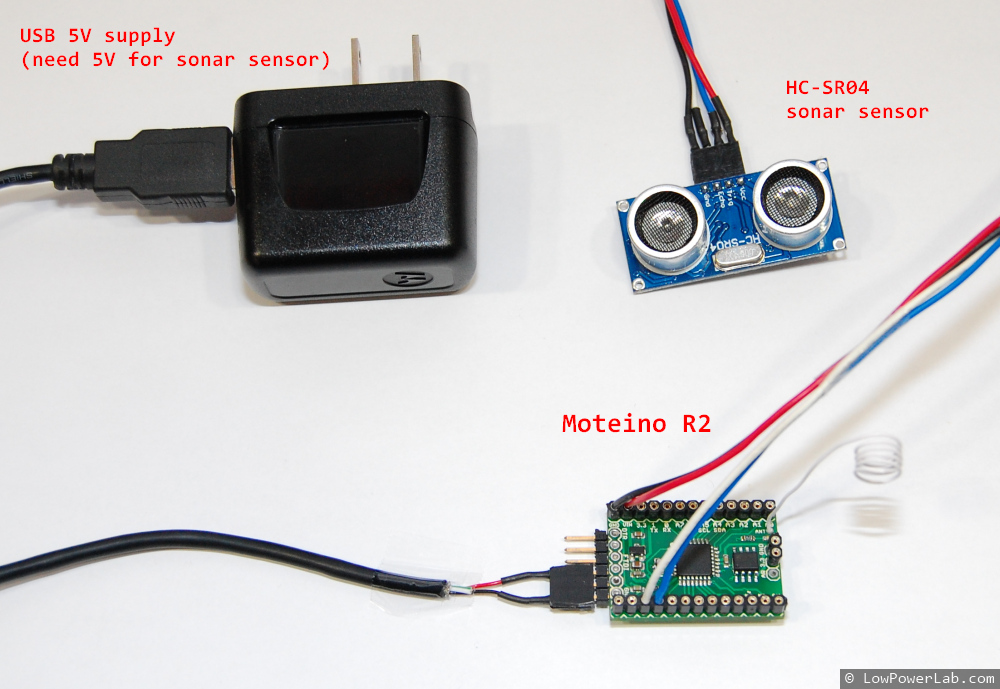
All I needed was a HC-SR04 sonar sensor and a USB 5V wall supply. The sensor only works at 5V so this method of powering the Moteino was very convenient since I already have an outlet close by for the sump pump.

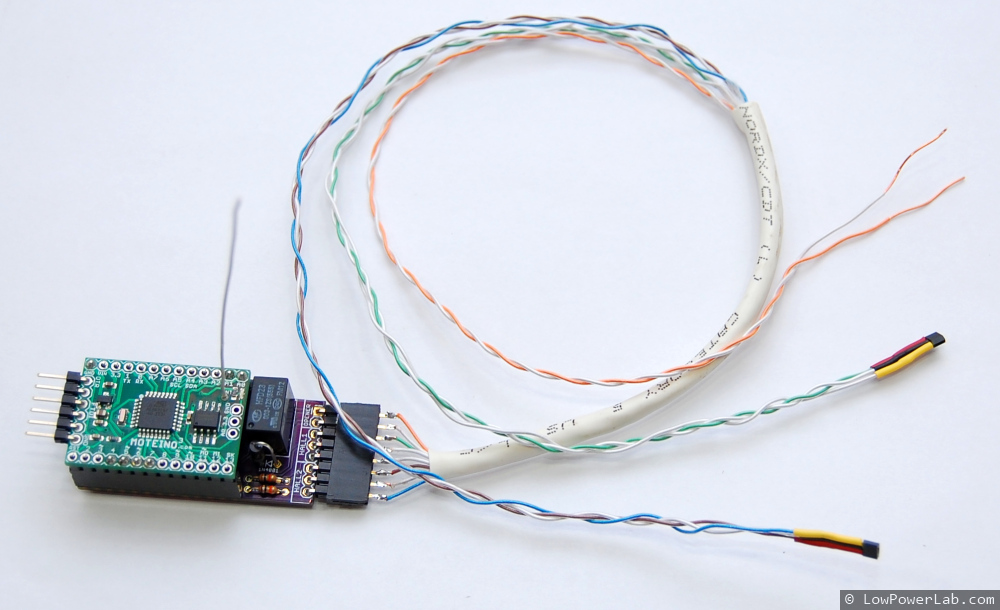
The sensor has 4 pins clearly marked: VCC, GND, TRIG and ECHO. I connected VCC to VIN on Moteino, ECHO goes to D3 and TRIG to D4.

Moteino_HC-SR04_SumpPumpAlert

I used some of the code this instructable to get started and added my wireless code to handle packets and blink the LED and was done in no time. The setup was very simple, I estimated a good spot underneath the sump pump cover where there are no obstructions inside, cleaned it up, taped some velcro, secured the wires and that was pretty much it.

 Moteino_HC-SR04_SumpPumpAlert_cover Moteino_HC-SR04_SumpPumpAlert_installed

I added a few lines of code to my main Python script running on the RaspberryPi.
By the way, here’s how my RaspberryPi setup looks like, including the ATXRaspi power controller, the power button and the gateway Moteino (it’s an older R1 but just as good for as a gateway):

Moteino_RaspberryPi_ATXRaspi_PowerButton

The Python script logs the data to EmonCMS and here’s a graph of how that looks like, the Moteino reports the distance to the water surface, so the spikes means the sump pump just kicked ON, and as water rises the distance decreases until the pump starts again:

EmonCMS_SumpPump

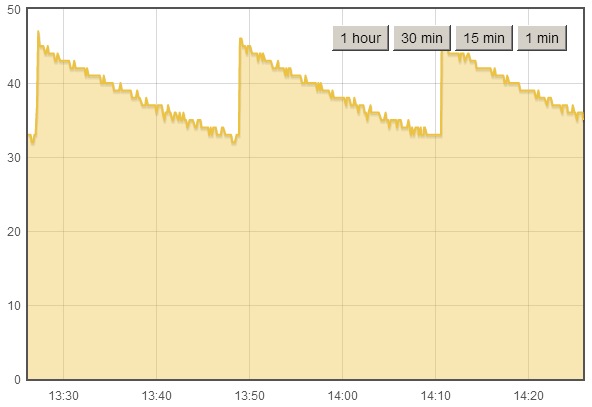
It’s been a rainy spring so far here and I knew my pump kicks ON quite often, now I can see it in real time, and setup alerts if the water rises too much. Seems like the pump is always pumping water out when it rises to 32cm below basement surface. So setting an alert to something like 20cm below surface should be enough since I don’t expect the water to ever rise so much as long as the pump works. The alert code will send me a SMS message when this happens, here’s a test level, I set the live value at 20cm:

Moteino_HC-SR04_SumpPumpAlert_SMS

You can of course setup other types of alerts – like audio alerts or maybe a LED visual indicator (less useful when you’re not in your basement).

Fun/Scary fact: The sensor is very accurate even though there’s a variance of 1cm between some readings (resulting in a sawtooth graph) as water rises. Based on the graphs, how often the water is pumped (every ~23 minutes), and how big the reservoir is, I figured my sump pump removes roughly about 18.5 liters every cycle, or about 1158 liters (306 gal) every day, wow!

So now there’s an extra level of peace of mind when I leave on vacation. I guess being gone for even 1 day could mean disaster if the sump pump breaks down at the same time!

Time to think about how to gather/store all that water instead of throwing it away, after all, I pay something like $11 for every 1000 gallons of city water.

Source code is on GitHub: https://github.com/LowPowerLab/SumpPumpAlert

Raspberry Pi websockets with Python & Tornado

I started to look into websockets for RaspberryPi. My Pi is overclocked at 900Mhz and it’s stable but even so it became apparent that loading it with too many HTTP requests for various things (streaming data into EmonCMS works over HTTP) can get slow. So here’s a simple working Hello-World websockets example in Python, using the popular Tornado websocket library. It’s a very simple echo program, but I think proves the point that websockets are much faster than HTTP requests since they are a direct link between the server and the browser.

RaspberryPi_websockets_example_python_tornado Continue reading