MailboxNotifier – Moteino based mail event notifier

For a few weeks I kept tweaking and playing around with my new mailbox event notifier, based on Moteino. It all started as a joke, then when I saw it actually works, I decided to beef it up and do a writeup and a video:

UPDATED hardware for this project: I modified the circuit and added an enclosure and battery voltage readings. Also a standalone LCD receiver. More details here. The rest of this post is for reference only, you should follow the details in the new post.

UPDATED Schematic: For stability you should add a 10K pull-up resistor between the OUTPUT and POWER pins of the hall effect sensor. I omitted that in the video and added that later. Also a battery POWER switch is very helpful. You should always disconnect POWER from the battery when you try to load the program to Moteino using your FTDI adapter!

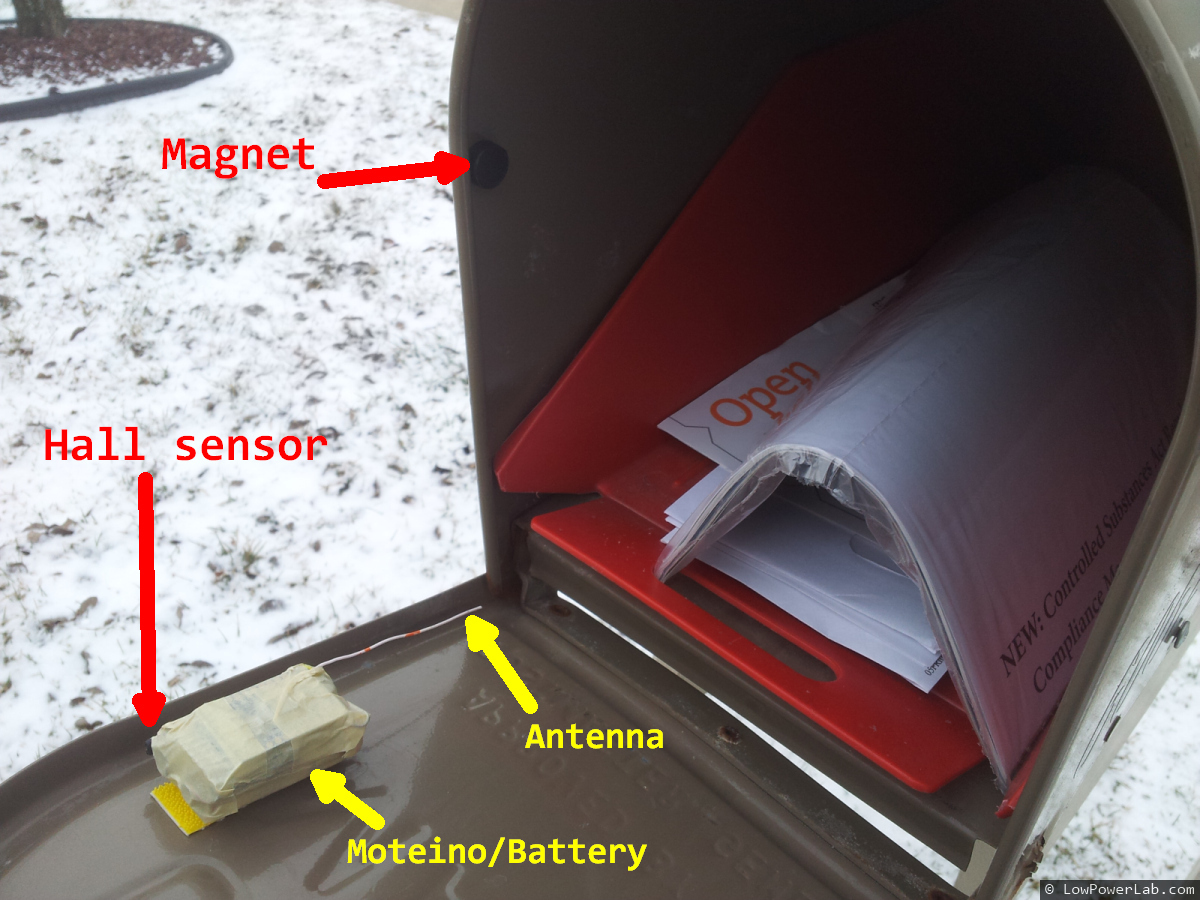
The details are simple. A hall effect sensor detects a magnetic field from an earth magnet. The earth magnet is placed inside the mailbox, while the Moteino/sensor/battery pack sits on the door. When the door is opened, the magnetic field is interrupted, the sensor flips state and the Moteino sends a “DOOR OPEN” message, or “DOOR CLOSED” when it’s closed.

The hall sensor uses ~2.5mA of power which is a lot for low power battery operation. So I added a 2N3904 NPN transistor (driven from a digital pin through a 2K resistor) to switch the sensor off when it’s not being used. When I need to read the hall sensor, I just turn on the transistor, read the sensor value, then turn it back off. That brings the total power consumption down to to an average of about 60uA, so the 9V battery should last a long time. To save power overall, the Moteino “sleeps” most of the time and only checks for events every 250ms using an interrupt timer. Every ~5s it reports when the mailbox door was last opened and last closed. This way I can distinguish between these 2 events and tell if the door was left open , or if someone else is messing with my mailbox.

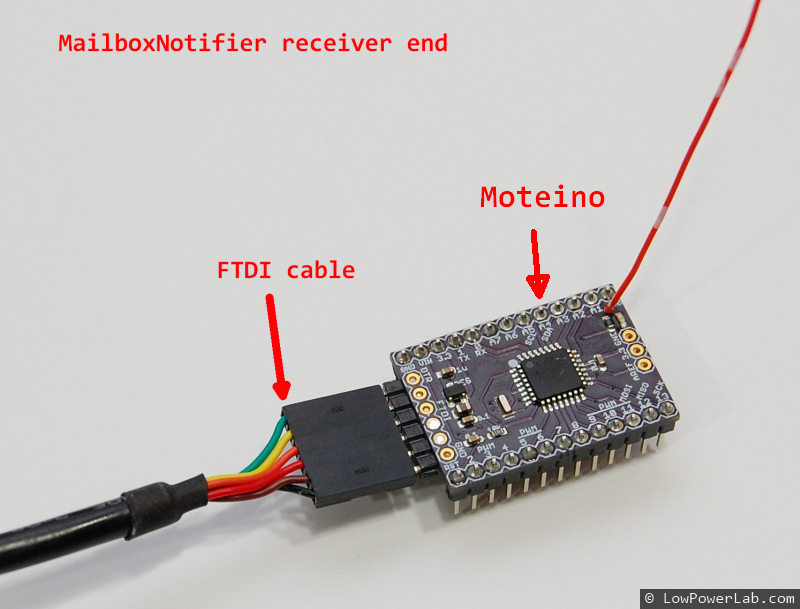
The receiver simply runs my RFM12B receiver sketch. It passes incomming messages through to the serial output. I can capture that on a PC or a RaspberryPi, running a python script which sends me an email or SMS message when a DOOR-OPEN message is received. This works great. To send an SMS, I simply send an email to my cell carrier sms  mailbox, in my case that is [email protected]

The python code to send an email/sms from python, and the arduino sketches that run on the sensor side and receiver are in my GitHub repository.

10 _ updated_

Tweet-A-Watt alternative solution

One of my long time interests has been to log my power usage. I have an ongoing project  which will enable logging the whole house power consumption. That’s cool but I also wanted a way to log data for individual appliances. So I bought a Tweet-a-Watt starter kit (TAW) from Adafruit. This was a really cool solution to allow me to enhance a Kill-A-Watt power monitor (KAW) and make it transmit the power usage wirelessly so I could graph/log it.

But there was a problem… unfortunately the TAW didn’t work 🙁

After assembling everything, as soon as I would plug in the KAW, the screen would be blank and slowly come to life but still quite unstable and flickery. Data would start coming on the other end but after about 1 minute, the KAW screen would flicker really bad, then go blank and data would stop streaming. I tried a few things but nothing worked. The conclusion was that the XBee radio used by the TAW was drawing too much power and the KAW could not handle its needs. Apparently I had a newer revision KAW which was lower power which could not supply enough power for the TAW. Forums revealed that different revisions of the KAW had similar problems.

So I designed an alternative transmitter circuit using a low power Arduino clone that I designed for other wireless data logging, the Moteino. The operation principle is the same as the circuit from Adafruit. Power comes from the KAW through a Shottky diode to keep dropout low and stop current flow back into the KAW. There’s also a capacitor to help stabilize the circuit when it transmits. The Moteino runs at 3.3v so the current/voltage sampling from the KAW is fed to analog pins on the Moteino through a simple 10kohm<>4.7kohm voltage  divider. An LED is used for transmission indication.

A python script was adapted from Adafruit’s version, to read data from a receiver Moteino, graph power and voltage/current waveforms, and also transmit power data to my Emoncms which is running on my RaspberryPi. The results are quite nice, you can see it in action in this video:

MikeT over at mikesmicromania.com posted his version of this project, this time including a Moteino!

Moteino – the wireless low power low cost arduino clone

This is and introduction to Moteino, a low cost wireless Arduino clone that I designed for my own projects, but since some people started asking about it i decided to try to make it available to others.

Some time ago I started to think of how I could build a simple network of arduino nodes for environmental data harvesting and home automation, but I wasn’t very happy with the existing solutions because they were either not the right size, not battery friendly, I had to hand solder the kits to keep cost low, etc. Ethernet shields  are also expensive and running wires around the house was out of the question.

So that’s how the Moteino concept was born. It’s based on the ATMEGA328p and has all the pins exposed, runs at 16Mhz, 3.3v. On the bottom it has a footprint for the RFM12B transceiver which is an excellent alternative to XBee radios, which are at least 3 times more expensive.

UPDATE: There’s now a dedicated All-About-Moteino page.

UPDATE: I posted some details about a Leonardo version of Moteino (based on ATMega32u4). For more details about MoteinoLeo click here.

I know there’s many other arduino clones out there that have similar specs. However most of these arduino clones are either somewhat overpriced, they are bulky, or you have to hand-solder them, which if fun for learning how to solder but is time consuming when you just need a bunch of these assembled. If you need 20 or 30 wireless arduino nodes, the time and money you spend can pile up.

So here are the highlights of Moteino:

  • Low cost Arduino clone fully compatible with the Arduino IDE
  • Designed for very low power battery operation
  • The Wireless version includes an onboard RFM12B transceiver and wire antenna
  • Very small size – 1.3 x0.9 inch
  • Breadboard friendly header layout allows you to attach female/male header pins on the top or bottom and make shields for it or just use it on the breadboard for prototyping
  • FTDI programming header
  • Optiboot bootloader for fast programming and no delay startup
  • Onboard LED for debugging or visual indication
  • Standalone version cost is around $10-12 and wireless version about $16, fully assembled

The onboard radio can act as a transmitter or receiver, and I prefer the 434Mhz version because it has longer indoor range and very good wall penetration, but nothing stops you from using a 915Mhz version.  Also if you’re in Europe the 434Mhz and 868Mhz bands are legal, not the 915Mhz.

This is my first revision and I still have some minor tweaks I want to make. But i’ll post updates as soon as i have them.

UPDATE: see my other Moteino posts, including Moteino based projects. Example code and RFM12B library at my GitHub repository.