GarageMote WeatherShield Upgrade

Now that WeatherShield is available to take high accuracy temperature, humidity and pressure measurements, it’s time to spread it around the property and watch the trends. I’ve already posted an example of upgrading my mailbox notifier project to include the WeatherShield. In this post I want to show my GarageMote upgrade to add a WeatherShield (WS), this was another quick evening project for today.

The garage is an interesting place to measure that data since it sits in between the house and the bitter winter cold or torrid hot summer. Would have been nice to have this data when I insulated my garage doors to see how effective that was.

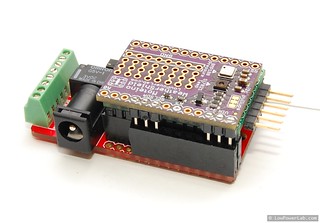
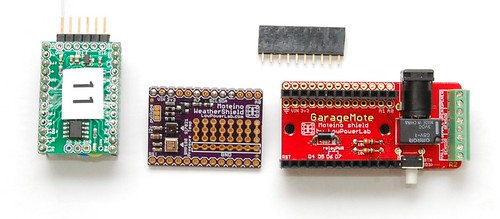
The new GarageMote R2 includes an extra row of pins that are linked to the Moteino top header, which can be used for any general purpose, add more stuff to your GarageMote. This is perfect since WS‘s relevant pins are all on that same side. I had a prototype WS that I chose to stack on top of the Moteino, so male headers get soldered below, but you could also flip it over and have it be side by side the Moteino with headers on top. I shield the bottom of the WS with electrical tape, and soldered a pair of long pin headers with the longer side on the bottom of the WS.
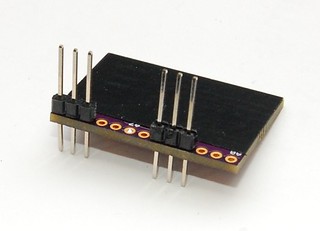
This allows stacking of the WS on top of the Moteino using the female header that I soldered to the empty side header on GarageMote, the extra length headers are clipped off the top of the WS. I then install it back onto the door opener as before. GarageMote is permanently powered so it can afford to leave the transceiver in RX mode which is also necessary to listen for commands from a browser or mobile device (OPEN, CLOSE etc). That means it can also listen for wireless programming tokens, in fact the GarageMote sketch was always programmed that way so if a firmware change is needed it wouldn’t need to be disconnected, but instead reprogrammed wirelessly. The new revision of the GarageMote sketch is updated to include the WS code for periodic reading/reporting of the sensors data (which is excluded by default, and can be enabled by uncommenting the #define WEATHERSHIELD directive).
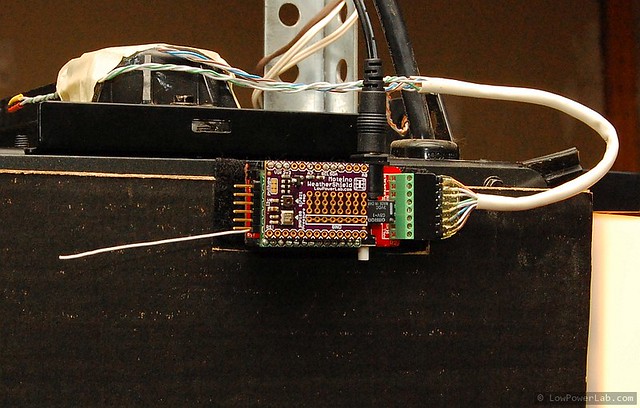
The resulting data arriving on the gateway looks like this:

F:4397 H:41 P:29.42

where F is fahrenheit degrees in hundreds (divide by 100), H is humidity in % and P is atmospheric pressure in inHg. The data is reported every 5 minutes, enough to get a pretty good resolution in a place that doesn’t expect large sudden fluctuations. Graphing and logging will be added later when I enhance the Gateway stack. For now this just serves as a quick demo and example of how WeatherShield can be used. Enjoy!

Mailbox Notifier Upgrade #3

As I explained in my lipoly+freezing=failure post, I ran into a snag with the brand new Lithium Polymer battery operated MotionMote that serves as my mailbox notifier. It discharges quickly after being exposed to the cold for a while, it seems like below 30F it goes downhill and then falls off the cliff and dies around 24F (-4C). After a recharge the cycle repeats, every time dying a little faster which means cold damages them permanently. So being tired of this nonsense I wanted to give alkalines a try and also wanted to add a WeatherShield to the mailbox, if it’s out there why not report temperature, humidity and pressure as well in addition to telling me when the mail is delivered.

UPDATE: the LiPoly batteries are still working great above freezing and will provide a compact and longer lasting charge than a 3xAAA pack. In the spring time I switch to a LiPoly because it lasts longer and I can charge it directly from the onboard USB of the MotionMote PCB. In the winter I go back to alkalines because they survive in the deep freeze.

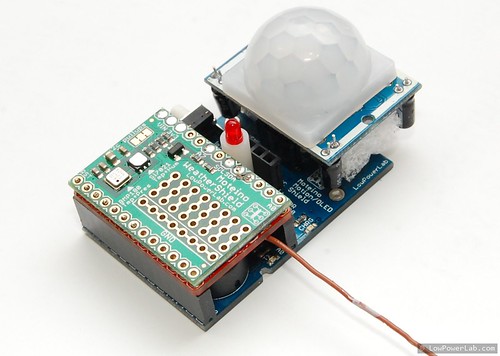
The first step was to solder the weather shield on top of the Moteino, only 7 pins are soldered after being raised a little: GND, VIN, 3.3, A7, A5, A4, A3. The bottom of the WeatherShield was insulated with a piece of electrical tape to avoid any shorts.

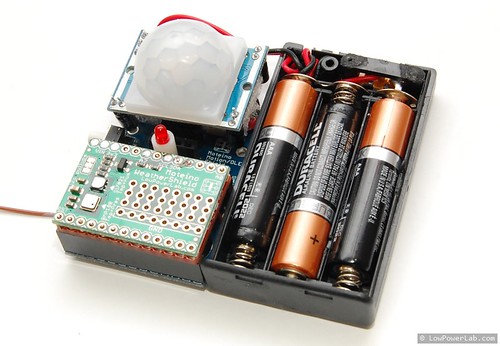
Then I added the new battery – a 3xAAA holder with older batteries. I needed 3x of them to get above 4V so there’s some head room for the voltage regulator on the Moteino and the PIR sensor which was modified to allow running into much lower voltages. I could have soldered the battery holder wires directly to the MotionMote PCB but I had some spare female JST connectors and I added that to make it easy to remove later if needed. I took the measurements to lasercut another box that will fit this.
With the help of previous box designs I was able to get the dimensions and hole alignments right the first try. The box blueprint is published here for those that might find it useful. Here’s everything after test fitting:

Velcro goes on the back and the Moteino antenna protrudes from a hole in the box through a short cut in the velcro. The wire antenna also goes out the mailbox through a tiny hole. The slots in the side allow air to go in for better humidity readings.
After some minimal coding, the mailbox notifier sketch is altered to do the WeatherShield readings. The new sketch is published in the same repo. The new mailbox is now smarter and it gives all the following readings:

LO:4h1m BAT:4.36v F:3475 H:37 P:29.32

where LO is last open elapsed time,  F is fahrenheit in hundreds (divide by 100), H is humidity in %, and P is atmospheric pressure in inHg. It’s also running happy after being buried in the last winter storm. In the morning when the sun hits the mailbox directly the temperature can rise 20-30 degrees above the real temperature, but otherwise throughout the day it’s pretty stable and comparable to WeatherUnderground, when it’s overcast it’s often within 1 degree of WU but I am aware there are multiple factors that can influence a temperature reading in such a location. Humidity and pressure readings are also very stable and rise very deterministically.