Laser Etching SMT Stencils Tutorial

etchedstencils_main

If you make PCBs and have any SMT components you likely need an SMT stencil to apply solder paste and then bake everything in an oven to reflow the paste. I’ve previously written an extensive tutorial on how to etch metal stencils from soda can material, still very popular, dirt cheap to make and pretty quick once you get a feel for it – it produces very high and extremely durable metal stencils. I’ve been literally using chemically etched soda can stencils thousands of times making Moteinos before I moved to stainless steel commercial stencils.

In this blog post I want to show you my new method that I’ve been using since I’ve purchased a laser cutter from china. It’s using the laser to etch stencils out of transparency plastic (mylar). Chances are that you already have membership or access to a local workshop or hackerspace where a laser cutter is available, so you can give this a try. The trick is to balance the power vs speed of the laser at that sweet spot where it won’t burn the plastic or over/under etch the pads. And for those really wondering why in the world I don’t order from OSHStencils (not affiliated with OSHPark) or similar affordable online services – some of it is explained in the video but mainly because instead of waiting a few days I can do it in 5 minutes, and the flat mylar allows making letter sized stencils. Don’t get me wrong, I support and use the OSHPark PCB service but I prefer to etch my own stencils on the fly on my laser, it’s really convenient and allows for errors and retries without another few days of waiting. Plus, I can do in mylar what they can’t in thin curvy kapton.

If laser etching is not an option for you, read below for another alternative method that yields great stencils from plastic transparency mylar. Continue reading →
New ATXRaspi reboot function

ATXRaspi will start to ship with a new reboot function in addition to the shutdown function it had since inception. This was implemented because it was a cool feature to have and also suggested by several ATXRaspi users. See video above for a full overview and setup guide for ATXRaspi.

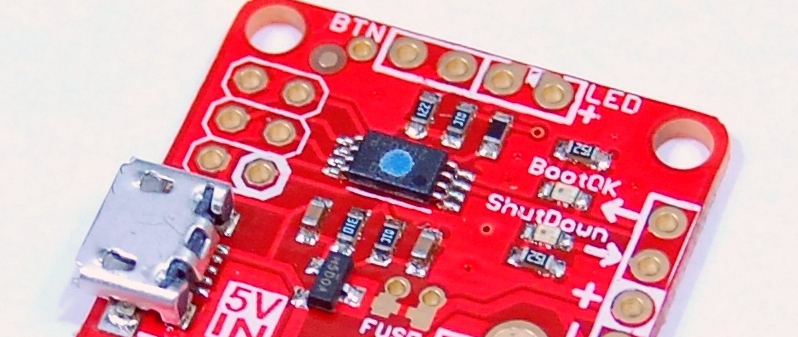
This will be in revision R2.6 boards but until that is released, revision 2.5 boards that have the reboot function will have a blue dot on the main chip (see photo above). The differences are the following:

  • to reboot: hold the button pressed for at least 0.5s and and less than 2s. The button backlight will dim once the reset threshold is met. Release the button and ATXRaspi will emit a 500ms HIGH pulse on the SHUTDOWN signal pin. It will then blink the button backlight for up to 1 minute while waiting for the Pi to reboot and the BOOTOK signal to be restored by the shutdowncheck script (to become HIGH again).
  • to shutdown – nothing changes: hold the button at least 2s. As before, the button backlight pulses slowly while the Pi shuts down. Once the shutdown is complete and BOOTOK signal goes LOW, ATXRaspi waits a few more seconds and cuts power off to the Pi.

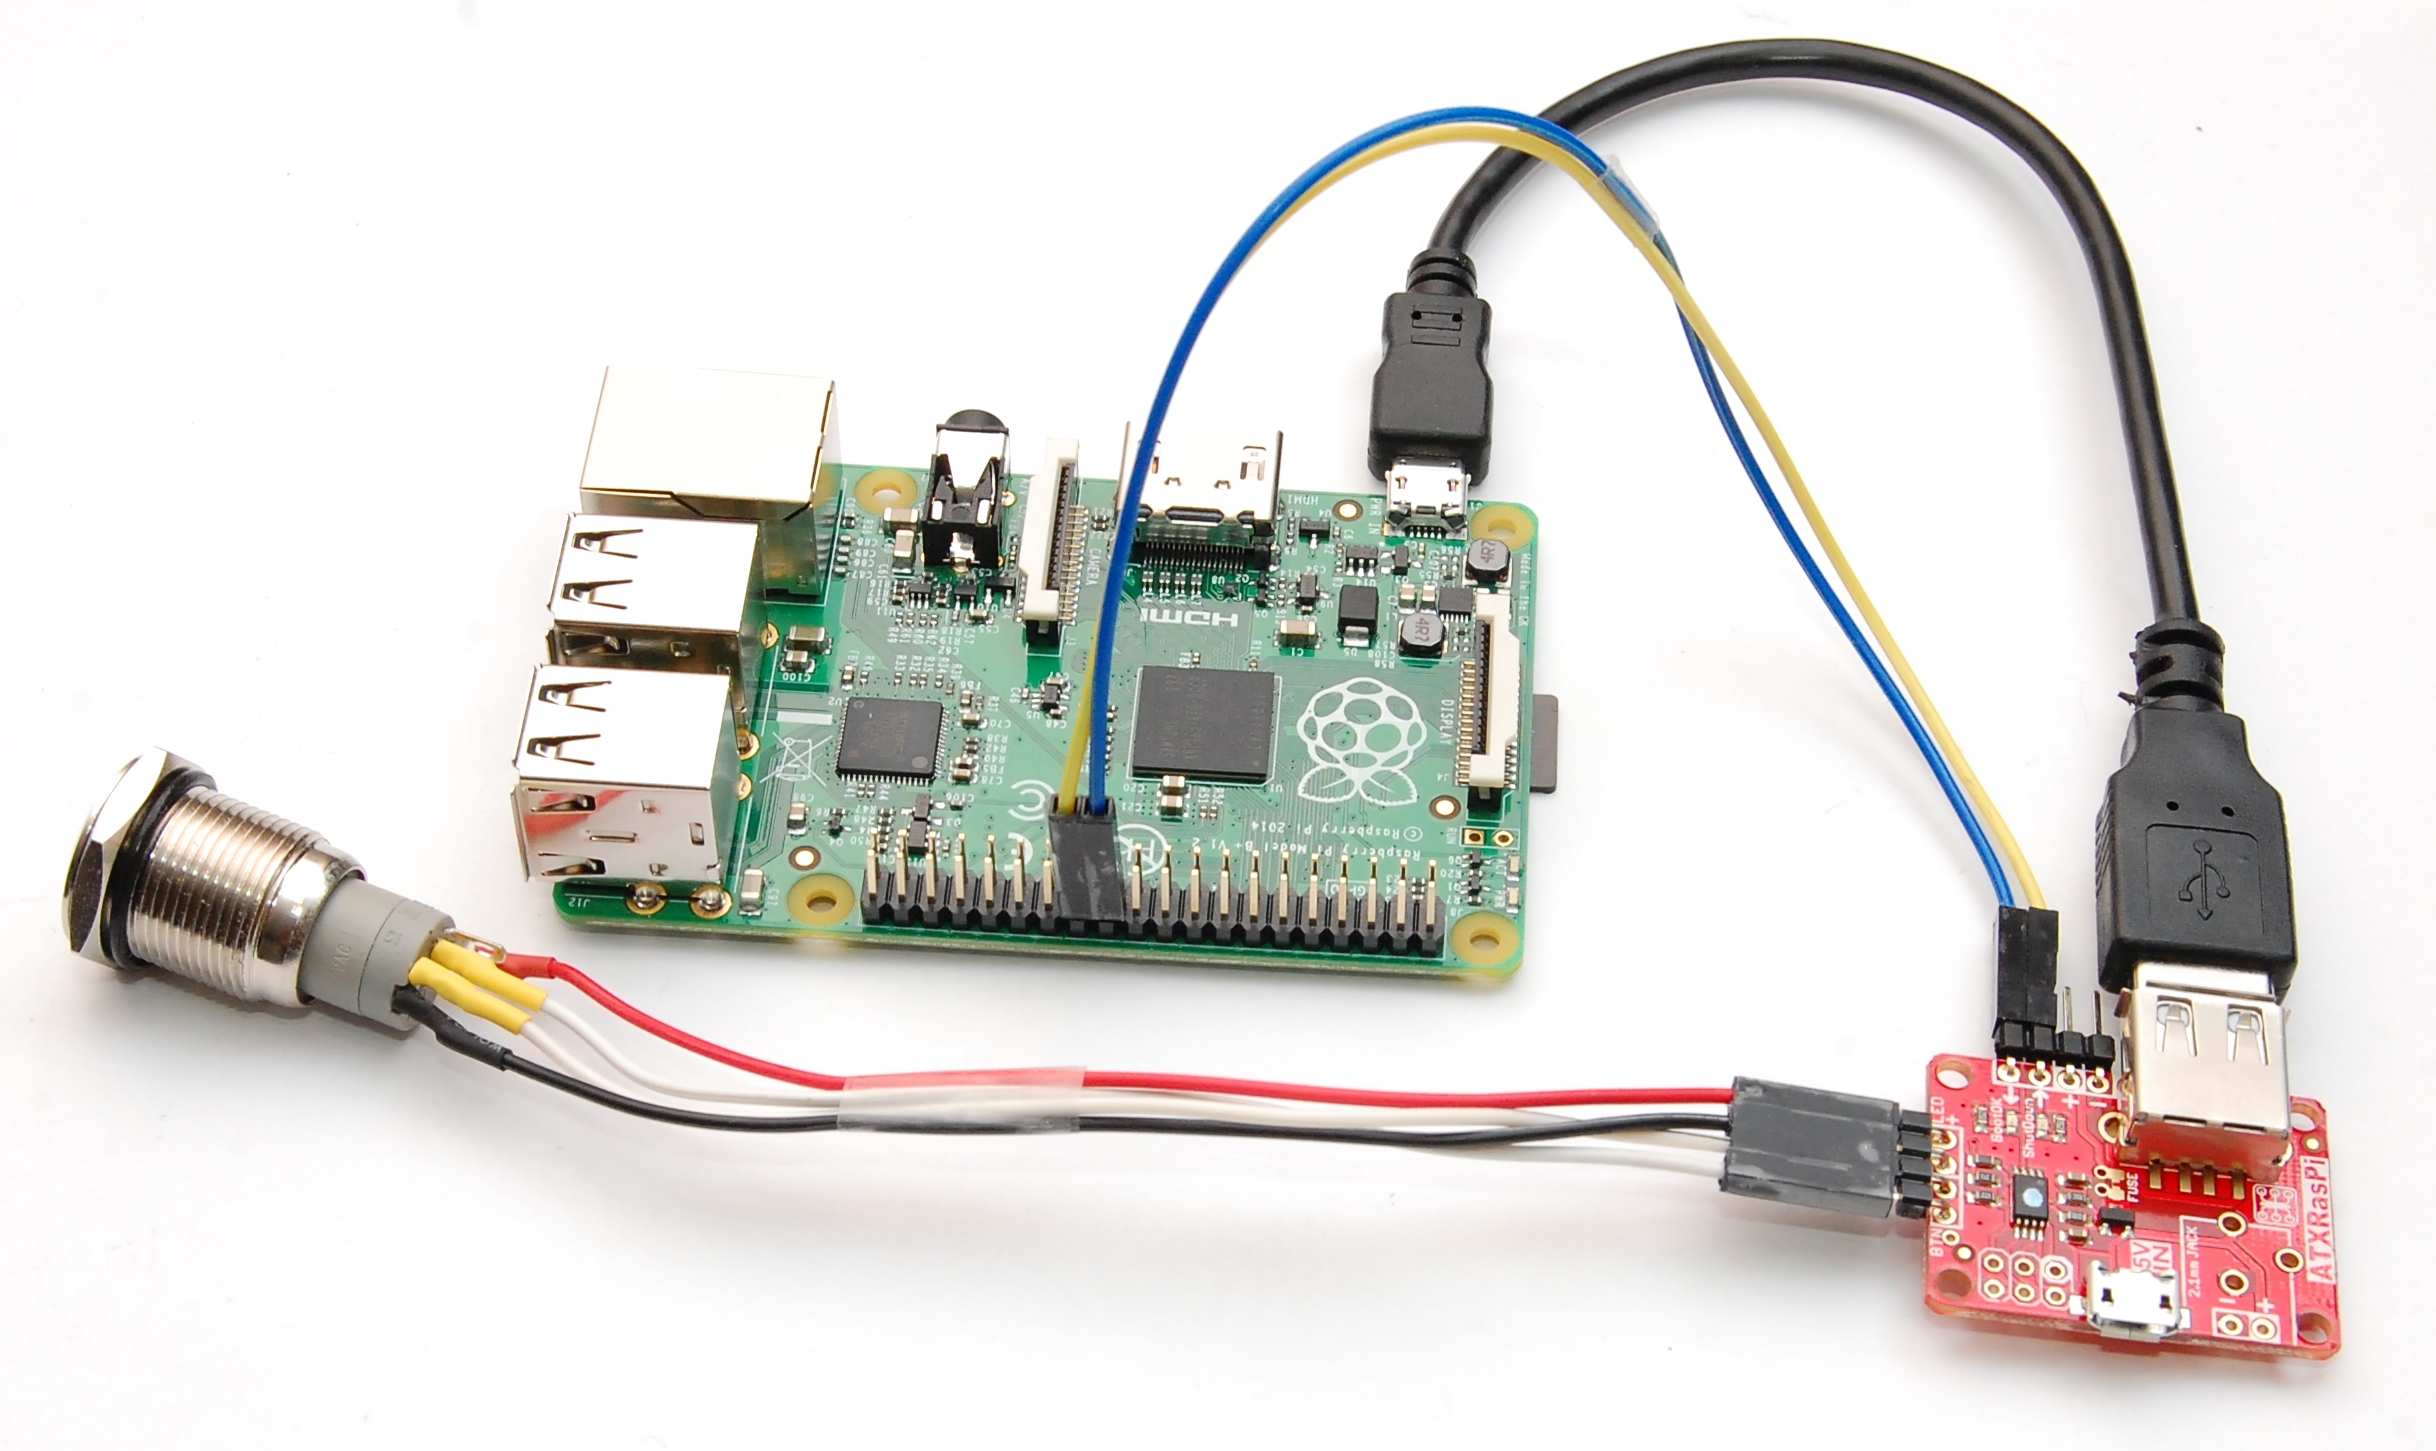
The shutdownchecksetup.sh install script was updated to support the reboot function and is backward compatible with all previous ATXRaspi revisions. Here’s a photo of the required wiring to the GPIO and an example wiring of the chrome button offered at the LowPowerLab shop:

Limited SonarMote and PiGateway offering

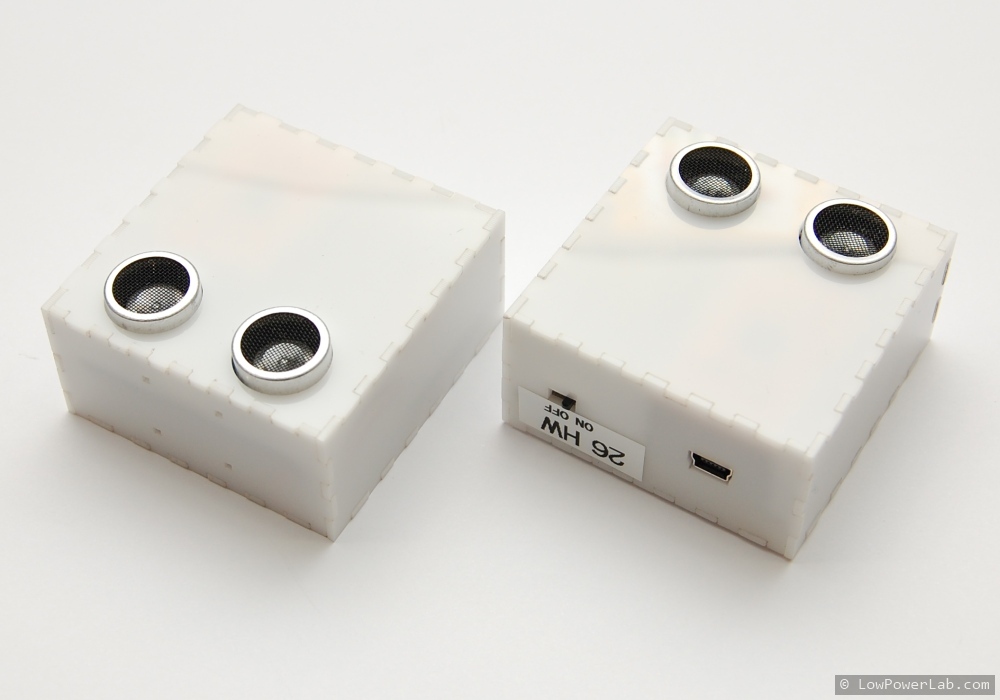
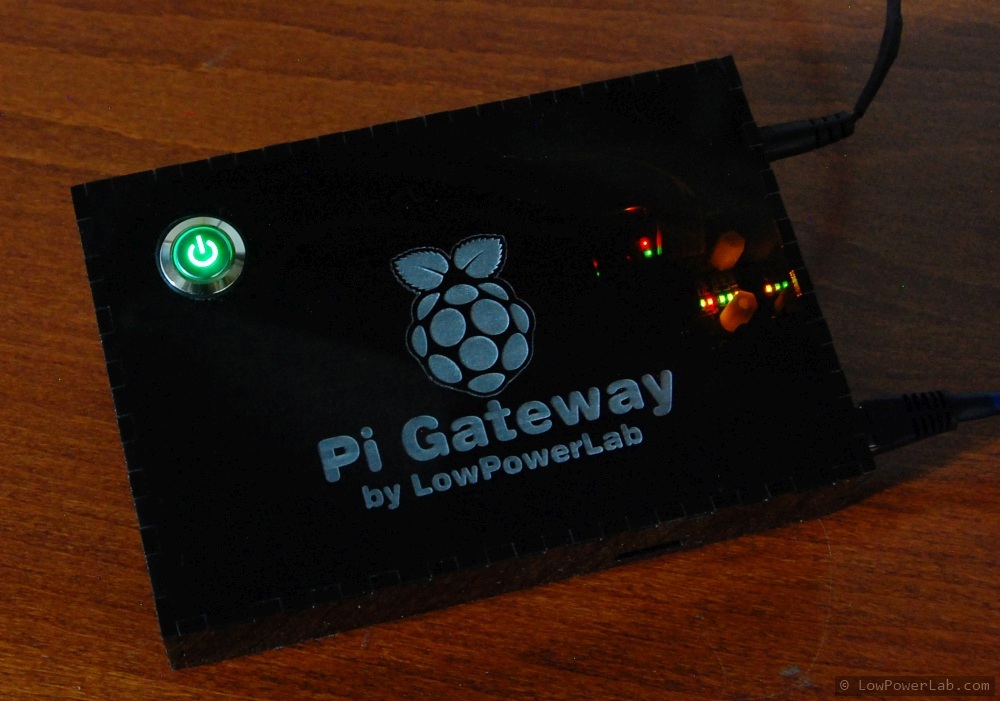
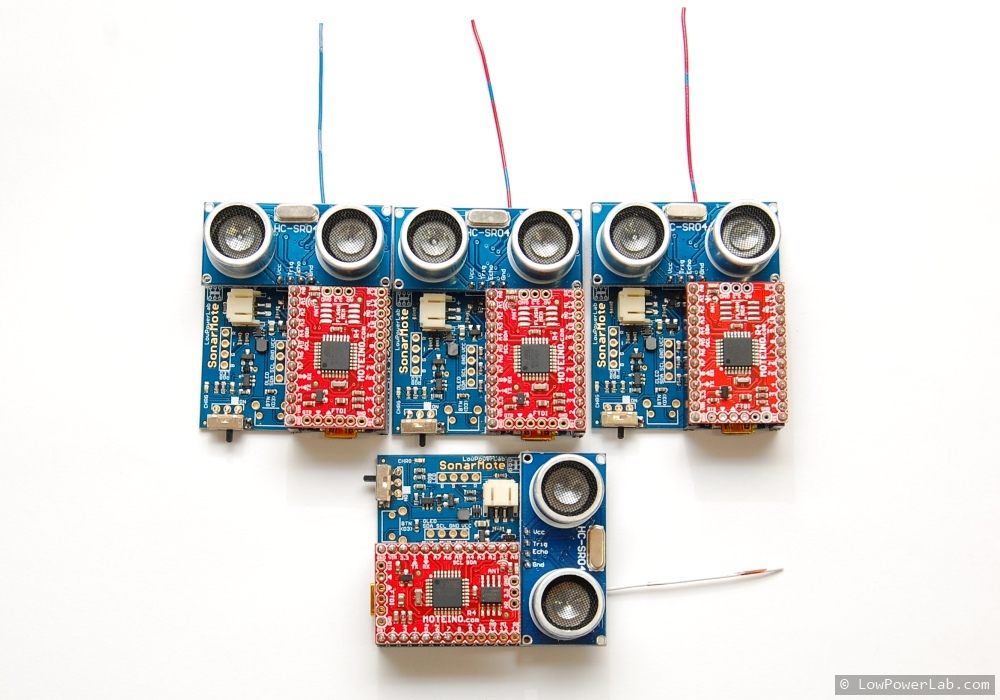
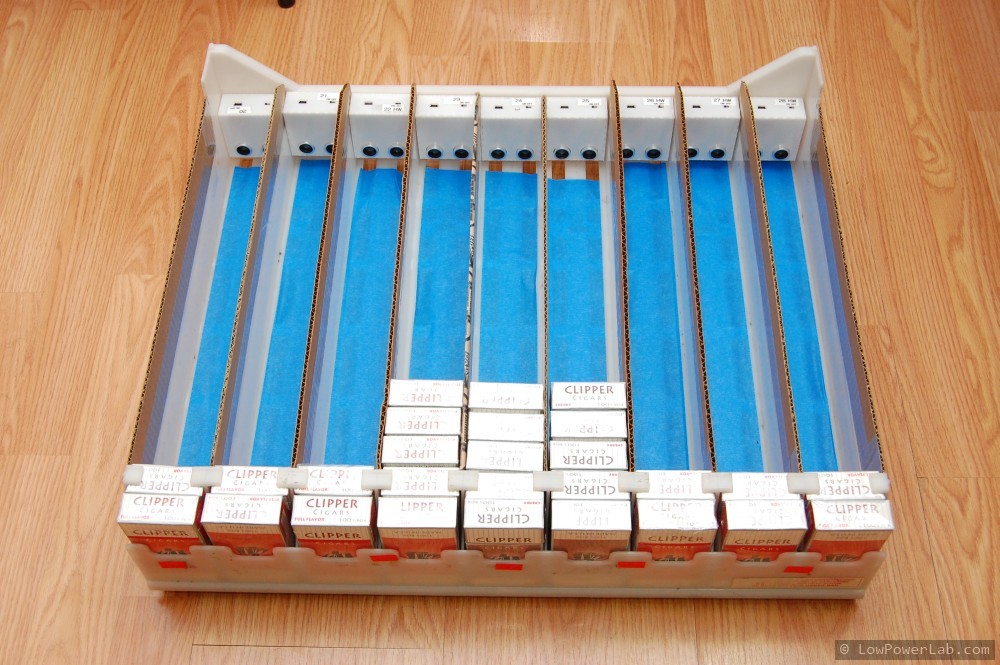
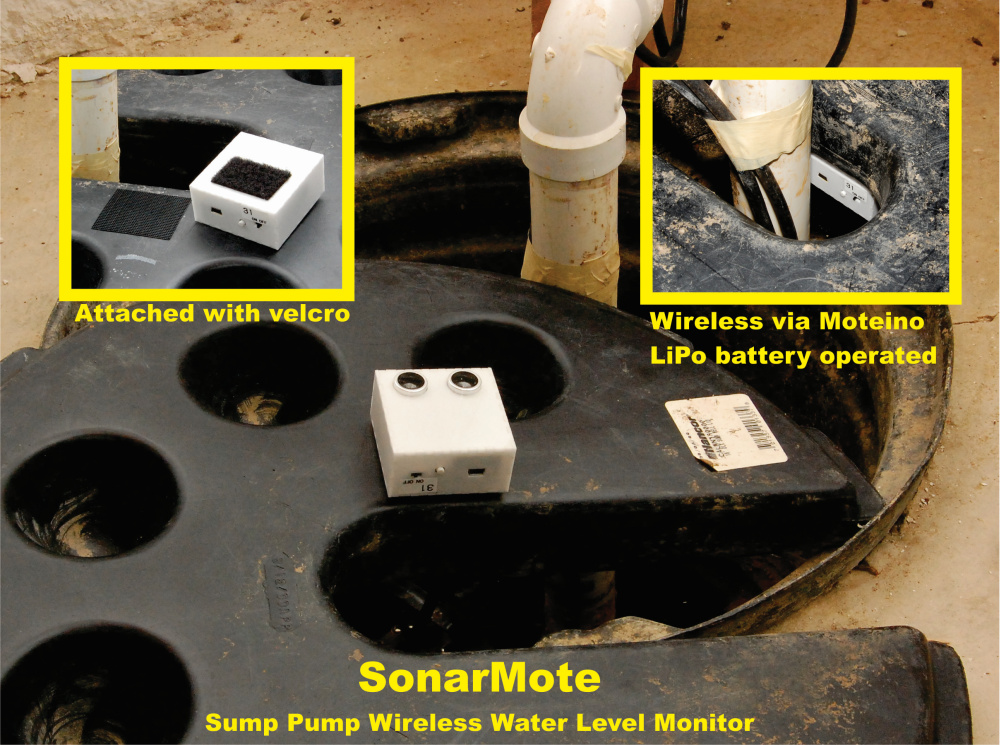
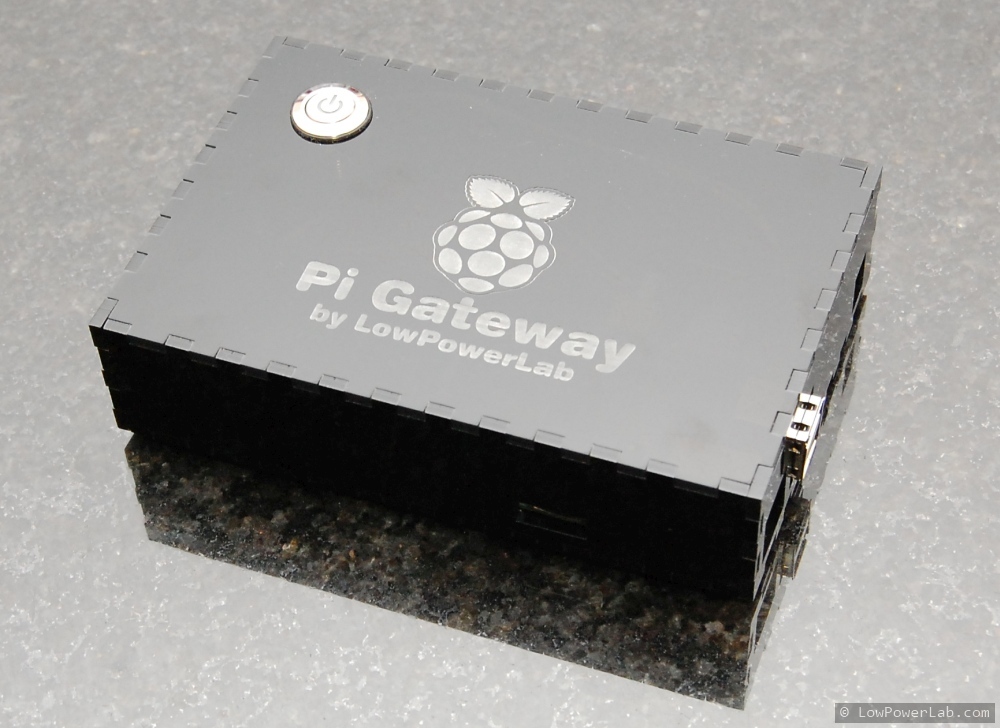
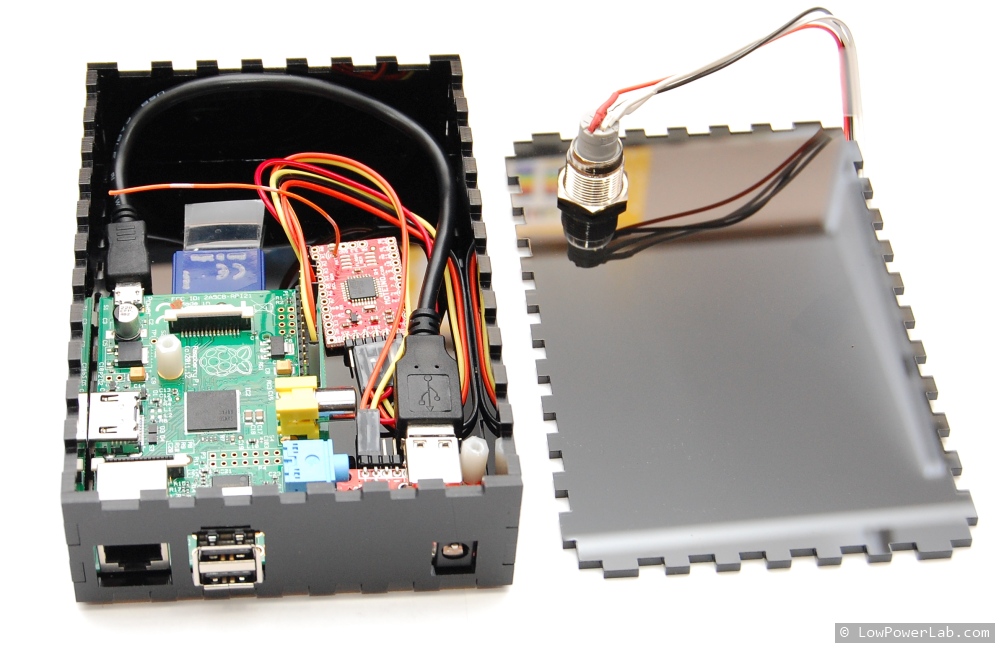
I worked on a project for inventory control and the hardware left over from that project is now available for sale for those interested to save time on assembly. There are a handful of assembled SonarMotes and a PiGateway. These limited LowPowerLab artisan electronic creations are available in the webshop (all SOLD).

SonarMote is a project I worked on for some time last year for private projects, but was never released to the public mostly because of the economics of manufacturing it and the end cost of the whole kit. But otherwise they are great for distance measurement, sump pump or liquid level monitoring, parking sensors, and general purpose distance sensors, battery operated and wireless via onboard Moteinos, and easy drop-ins into your Moteino framework. For instance, I am using one of these to monitor my sump pump. Now the rest of the few assembled units can be all yours. They run on LiPo batteries (1500mAh included in case) and are rechargeable and programmable via USB port just like the MotionMote. Note all are RFM69 868-915mhz. The rest of the specs are posted on the product page.

The PiGateway is a unique build that includes an ATXRaspi and LED Switch, Moteino with RFM69HW 868-915mhz, 4GB SDcard with Raspbian and Nginx-node webstack, 2.1mm jack power adapter and slick black translucent acrylic case.

New SwitchMotes available

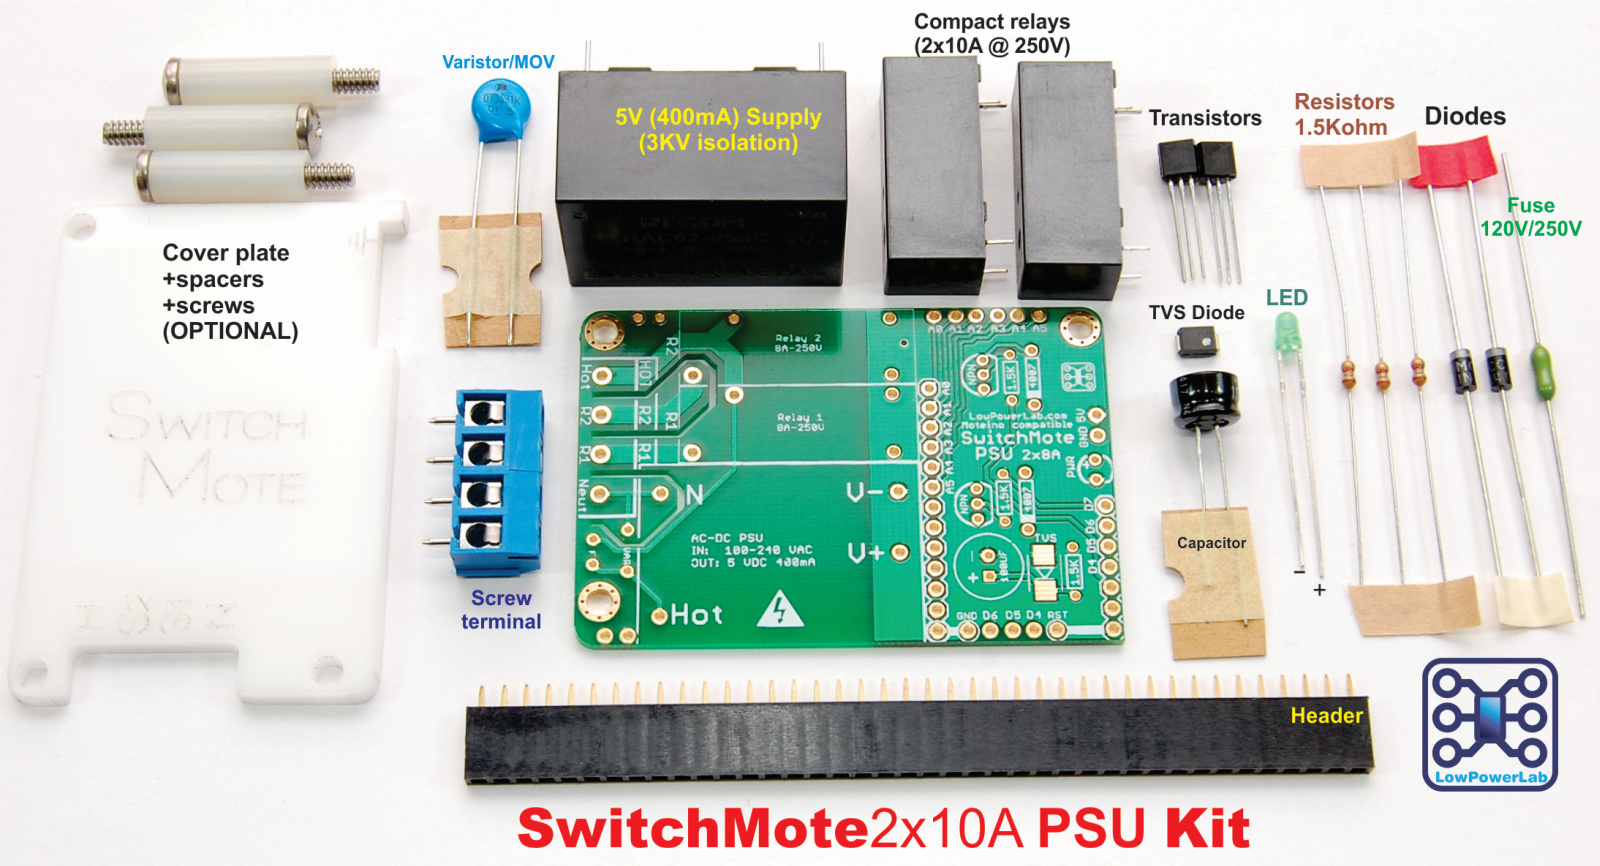
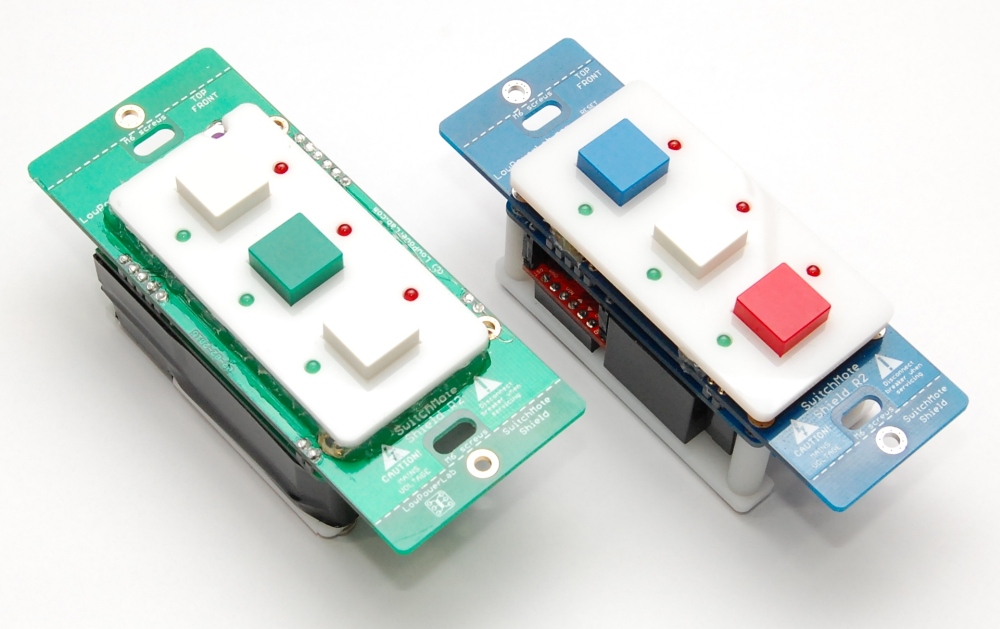
I’ve released some new SwitchMote kits after some requests by different users of SwitchMote. All SwitchMotes are wireless AC actuators, some designed to replace conventional light switches for the purpose of automating household light switching. Specifically there is a new dual 10A relay SwitchMote (and PSU):

There is a new assembly guide for this specific variant posted here. Here are some photos if it assembled and compared to the original SwitchMote:

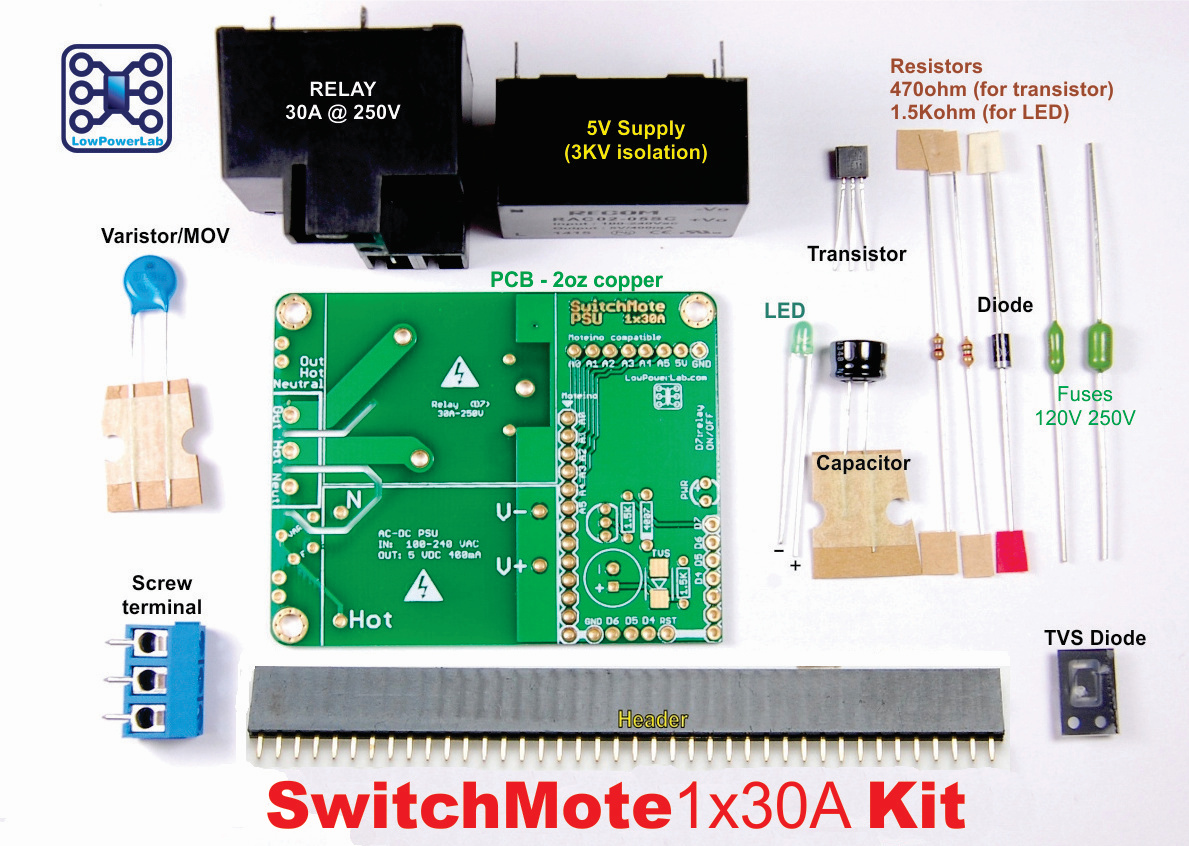
Also there is a new single 30A relay SwitchMote PSU for heavy AC loads. The PCB for this particular one has double copper thickness to support the loads (2oz copper). Note that the relay has parallel posts at the top for heavy duty connectors as an option.

The demonstration of this PSU has already been posted in a video a few days ago:

The demo in the video uses the TxRxBlinky sketch. All of these are available at the Low Power Lab webStore. The SwitchMote guide page has been updated to include these new variants and the SwitchMote sketch was updated to support the new dual relay SwitchMote 2x10A.

MoteinoMEGA pick & place assembly

I spent yesterday evening assembling boards and I shot this video. It shows a closeup of the pick and place assembling a panel of MoteinoMEGAs. There are some other posts I wrote related to pick and place technology you may want to check if this is something new to you. The main things to take from this video are:

  • effective CPH (components per hour) rating is affected in large by several factors like travel from pick position to placement position, travel speed, mechanical alignment in X and Y directions, vision alignment of each board, pick retries, dropped components, feeder reloading, feeder/tape jams, and many others.
  • some components require a medium pick/travel speed and fine settle placement because they are “special” and may flip or get misaligned.

I hope I will have the patience and time to write a more in depth article and share my experience with this machine and more gotchas about picking and placing. This is still a very much entry level machine, but a semi-pro one, so I would still consider it a “real” pick and place since it can assemble a full panel with hundreds/thousands of parts without ever touching the machine.

Moteino R5-USB & FTDIAdapter R2

There is now a new revision of Moteino USB (R5). It has 27ohm resistors on the D+/D- lines and pulled up the RST line on the FT231XS chip which should help with any upload issues, see this forum post for more details.

Also the new FTDI Adapter (R2) fixes the same issue and also switches from FT232RL to FT231XS. The reason being the economics of using a chip that is not only cheaper while doing the same function, but also the one and only USB-serial converter I now use.

I assemble all these boards on a pick and place machine and having a reduced and more efficient BOM makes a big difference. The FT232RL came in a wide 24mm tape which occupied a separate 24mm feeder. Buying a full reel of those parts is an impossibility given the price, and partial reels require a leader to load into the feeder, an extra fee every time you buy anything less than a full reel. Plus, some of the leader tapes I buy from Digikey break off pretty easily and so it’s a pain to work with individual feeders and I’m trying to avoid leader tape whenever I can. The FT231XS come in tubes which makes it much easier to work with using the vibe feeder. The only downside is that I have to reload them more often (58 parts per tube).

GarageMote WeatherShield Upgrade

Now that WeatherShield is available to take high accuracy temperature, humidity and pressure measurements, it’s time to spread it around the property and watch the trends. I’ve already posted an example of upgrading my mailbox notifier project to include the WeatherShield. In this post I want to show my GarageMote upgrade to add a WeatherShield (WS), this was another quick evening project for today.

The garage is an interesting place to measure that data since it sits in between the house and the bitter winter cold or torrid hot summer. Would have been nice to have this data when I insulated my garage doors to see how effective that was.

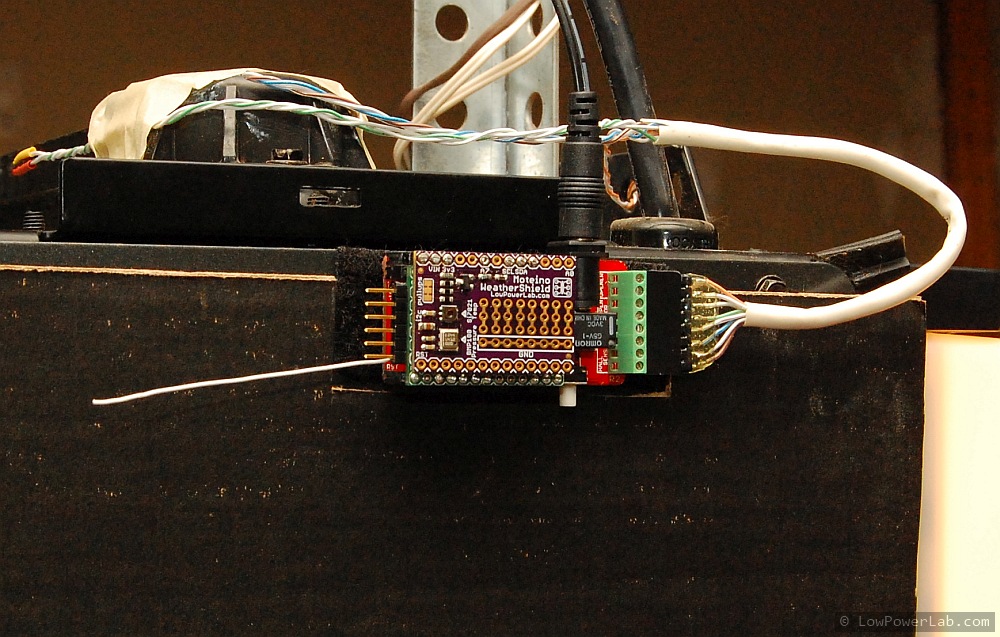
The new GarageMote R2 includes an extra row of pins that are linked to the Moteino top header, which can be used for any general purpose, add more stuff to your GarageMote. This is perfect since WS‘s relevant pins are all on that same side. I had a prototype WS that I chose to stack on top of the Moteino, so male headers get soldered below, but you could also flip it over and have it be side by side the Moteino with headers on top. I shield the bottom of the WS with electrical tape, and soldered a pair of long pin headers with the longer side on the bottom of the WS.

This allows stacking of the WS on top of the Moteino using the female header that I soldered to the empty side header on GarageMote, the extra length headers are clipped off the top of the WS. I then install it back onto the door opener as before. GarageMote is permanently powered so it can afford to leave the transceiver in RX mode which is also necessary to listen for commands from a browser or mobile device (OPEN, CLOSE etc). That means it can also listen for wireless programming tokens, in fact the GarageMote sketch was always programmed that way so if a firmware change is needed it wouldn’t need to be disconnected, but instead reprogrammed wirelessly. The new revision of the GarageMote sketch is updated to include the WS code for periodic reading/reporting of the sensors data (which is excluded by default, and can be enabled by uncommenting the #define WEATHERSHIELD directive).

The resulting data arriving on the gateway looks like this:

F:4397 H:41 P:29.42

where F is fahrenheit degrees in hundreds (divide by 100), H is humidity in % and P is atmospheric pressure in inHg. The data is reported every 5 minutes, enough to get a pretty good resolution in a place that doesn’t expect large sudden fluctuations. Graphing and logging will be added later when I enhance the Gateway stack. For now this just serves as a quick demo and example of how WeatherShield can be used. Enjoy!

Mailbox Notifier Upgrade #3

As I explained in my lipoly+freezing=failure post, I ran into a snag with the brand new Lithium Polymer battery operated MotionMote that serves as my mailbox notifier. It discharges quickly after being exposed to the cold for a while, it seems like below 30F it goes downhill and then falls off the cliff and dies around 24F (-4C). After a recharge the cycle repeats, every time dying a little faster which means cold damages them permanently. So being tired of this nonsense I wanted to give alkalines a try and also wanted to add a WeatherShield to the mailbox, if it’s out there why not report temperature, humidity and pressure as well in addition to telling me when the mail is delivered.

UPDATE: the LiPoly batteries are still working great above freezing and will provide a compact and longer lasting charge than a 3xAAA pack. In the spring time I switch to a LiPoly because it lasts longer and I can charge it directly from the onboard USB of the MotionMote PCB. In the winter I go back to alkalines because they survive in the deep freeze.

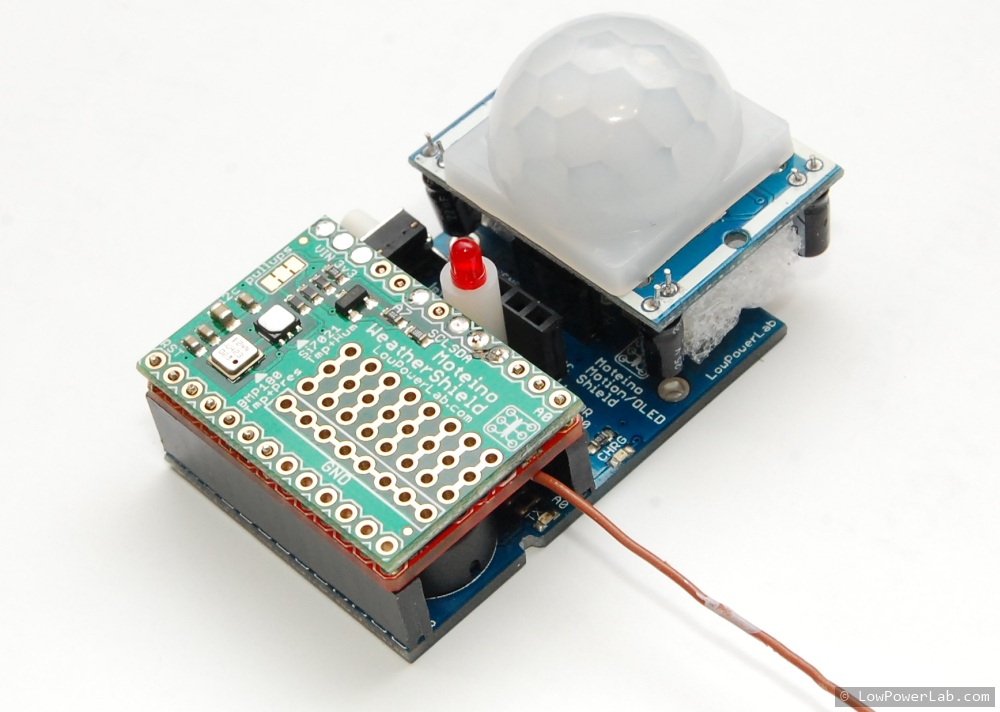
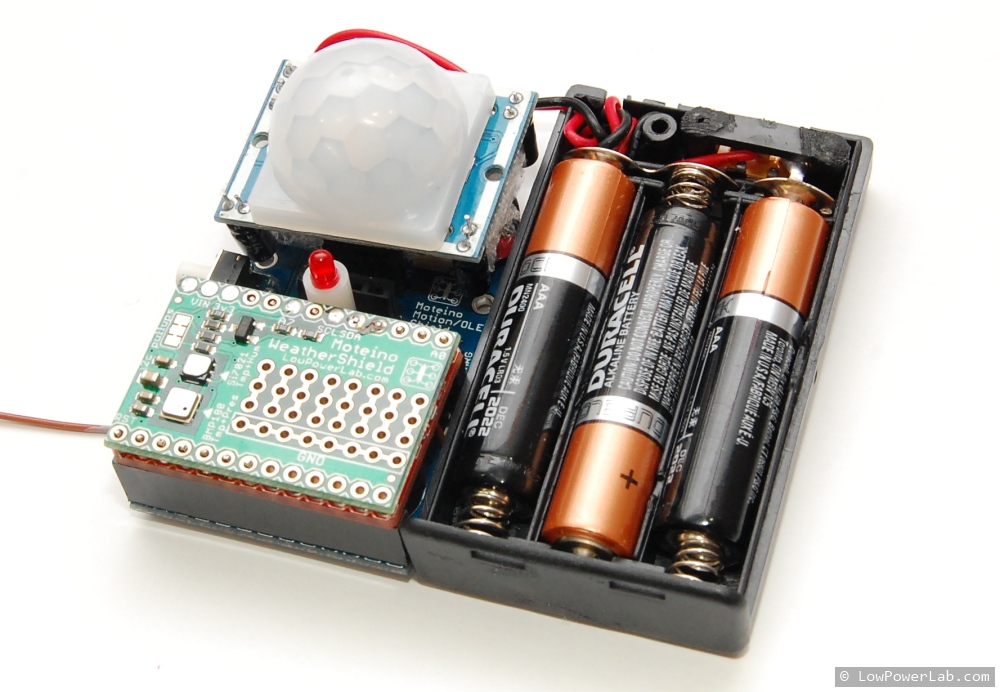
The first step was to solder the weather shield on top of the Moteino, only 7 pins are soldered after being raised a little: GND, VIN, 3.3, A7, A5, A4, A3. The bottom of the WeatherShield was insulated with a piece of electrical tape to avoid any shorts.

Then I added the new battery – a 3xAAA holder with older batteries. I needed 3x of them to get above 4V so there’s some head room for the voltage regulator on the Moteino and the PIR sensor which was modified to allow running into much lower voltages. I could have soldered the battery holder wires directly to the MotionMote PCB but I had some spare female JST connectors and I added that to make it easy to remove later if needed. I took the measurements to lasercut another box that will fit this.
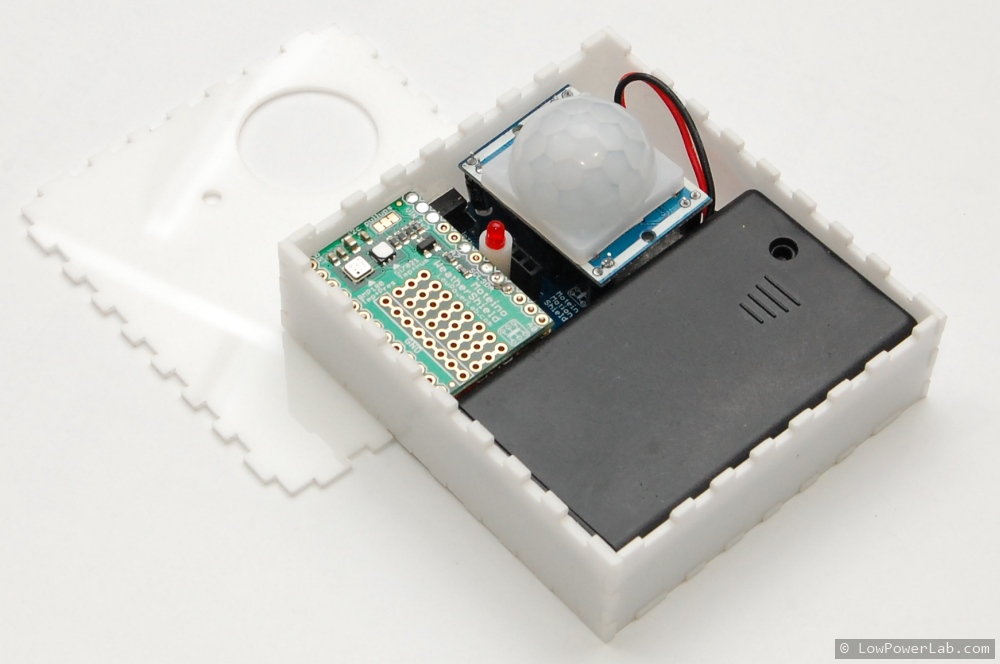
With the help of previous box designs I was able to get the dimensions and hole alignments right the first try. The box blueprint is published here for those that might find it useful. Here’s everything after test fitting:

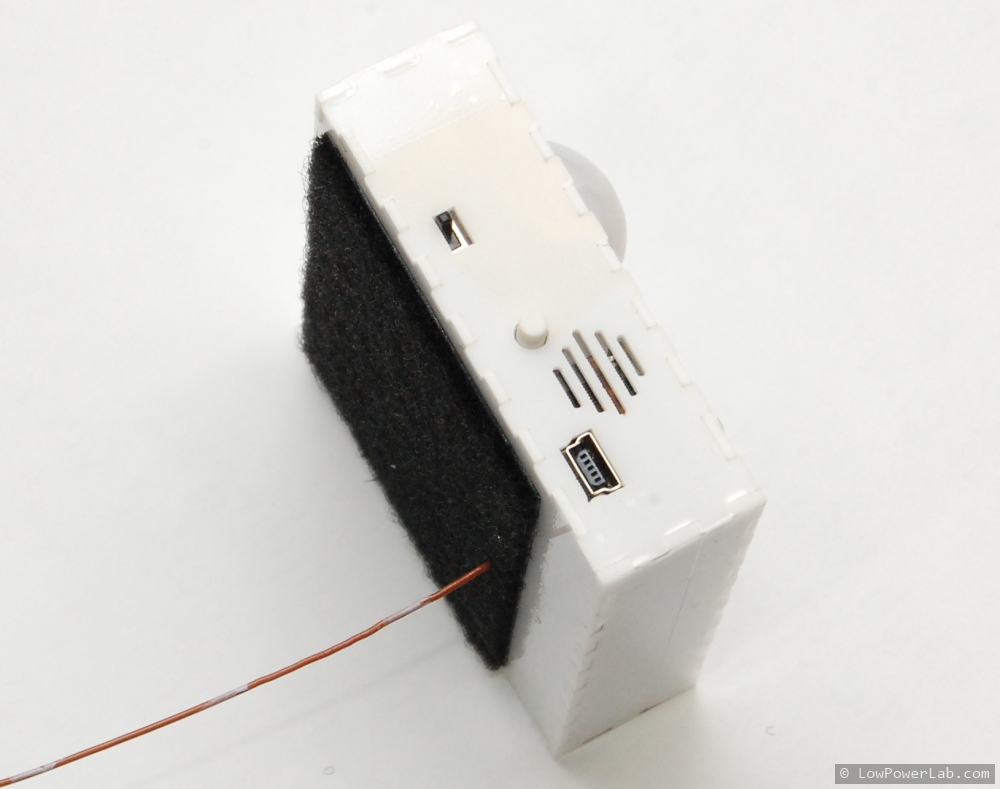
Velcro goes on the back and the Moteino antenna protrudes from a hole in the box through a short cut in the velcro. The wire antenna also goes out the mailbox through a tiny hole. The slots in the side allow air to go in for better humidity readings.
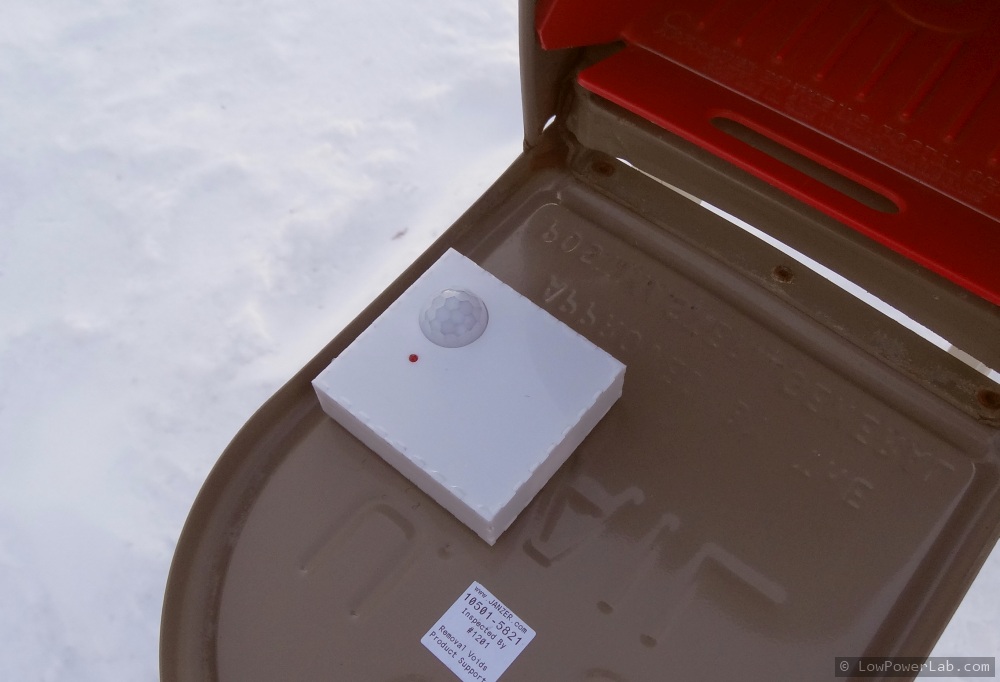
After some minimal coding, the mailbox notifier sketch is altered to do the WeatherShield readings. The new sketch is published in the same repo. The new mailbox is now smarter and it gives all the following readings:

LO:4h1m BAT:4.36v F:3475 H:37 P:29.32

where LO is last open elapsed time,  F is fahrenheit in hundreds (divide by 100), H is humidity in %, and P is atmospheric pressure in inHg. It’s also running happy after being buried in the last winter storm. In the morning when the sun hits the mailbox directly the temperature can rise 20-30 degrees above the real temperature, but otherwise throughout the day it’s pretty stable and comparable to WeatherUnderground, when it’s overcast it’s often within 1 degree of WU but I am aware there are multiple factors that can influence a temperature reading in such a location. Humidity and pressure readings are also very stable and rise very deterministically.
Chinese lithium cells don’t like freezing

LiPo_freezing

The background story
It’s winter again and freezing temps are taking a hard toll on the lithium polymer (aka lithium ion) battery in my mailbox notifier. You’d think the *not-so-cheap-anymore* lithium Ion/Polymer batteries you find on all the online electronics reseller should be fine even at -40C if hobby drones and electric cars like Teslas run on lithium batteries right? Wrong.

I used to have a MotionMote powered by a LiPo in my mailbox and I found that below a certain freezing point the LiPo battery would simply fail and need recharging, and it looks like there is irreversible damage to the cell due to the freezing temps (every cycle it dies it dies faster). Maybe this is an edge case but I don’t think I’m asking much of a LiPo battery to survive Michigan winter, I mean really – half the projects I can think of are outdoors. If you’re able to read through the chinglish datasheets for these LiPos, one thing that you can find is the low temperature operating point is somewhere around -20 to 0C (ex. here or here – look for “Working temperature” it will be -20 – 60C). So basically those are lies and misleading information, nothing unusual from our friends in china who love to sell us junk for what is now a trend of increased prices. These batteries from all US vendors are chinese and fail at between 20-30F (-4C). I bought several from different vendors to verify I don’t have a bad batch. They all fail. What I find intriguing is the guilty silence of the US resellers who promote these batteries. This is meant to break that silence or ignorance: chinese LiPos die in freezing temps!
Just think of all those kickstarters that use lipo batteries, here’s a photo camera that runs on Lipos and you will discover will likely fail when you take it on a fun in the snow day.

I trusted the datasheet and got burned, even sourced a larger batch of these batteries intending to offer along with the MotionMote kit and then realized they fail below freezing when the winter season arrives. I also found that USPS doesn’t ship batteries at all and there is a restriction of 2 batteries (larger than ~750mAh) with UPS and Fedex, a rule broken by at least one of the major US vendors that will I won’t name but I bet you are a customer of, it surprised me. I don’t know what’s the penalty if you get caught shipping more than allowed HAZMAT limits. So I gave up trying to arrange shipping for these cells and instead I will try to make my stuff with alternative power sources in mind, at least for the projects that make a lot of sense to be used outdoors. In fact I think all my projects that have lithium battery JST connectors also have adjacent pins to connect any other power source like AA battery holders if desired.

Of course LiPolys are prefectly fine indoors and will offer a high charge density per volume and are great for MotionMotes and other similar nodes; they are also very popular with hobbyists so I will continue to make boards that support them (boards with chargers), but I will probably never sell them knowing these limitations and given the difficult shipping restrictions.

Fixing my problem
As it turns out alkalines are pretty happy in freezing temps, and in the following post I will show the new upgrade iteration to my mailbox notifier, which not only replaces the battery but enhances it to make it into a weather monitor as well!

WeatherShield is here!

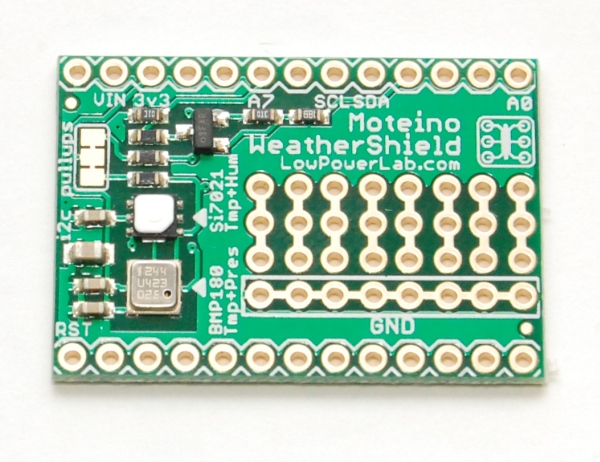
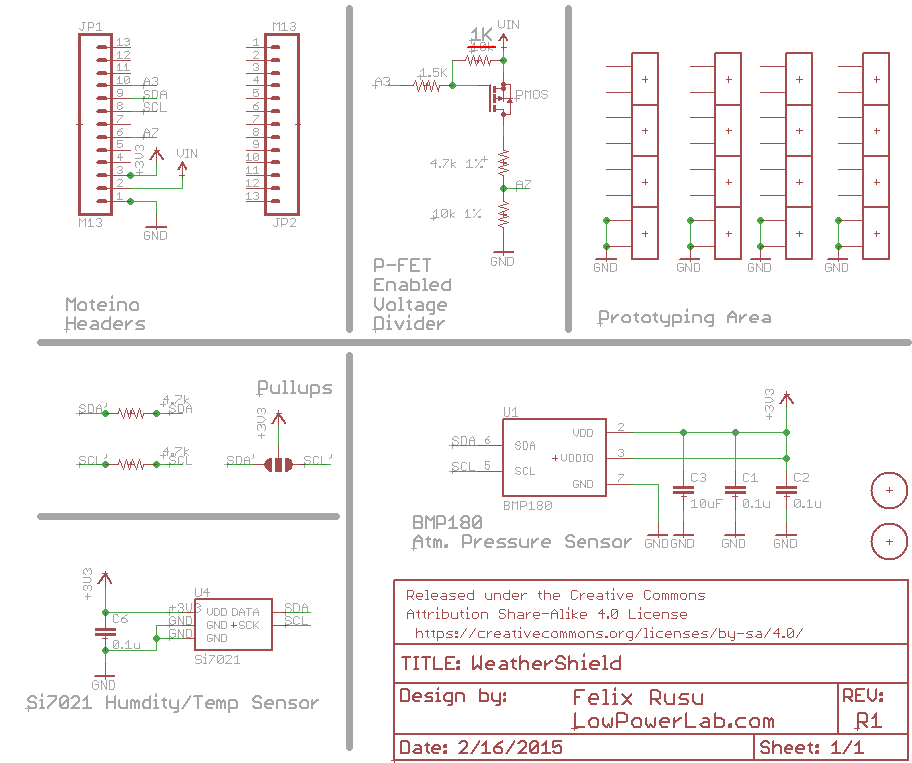
I kept mentioning this in the forum from time to time and I’m happy to release the first batch of WeatherShields which is now available in the shop. These are highly accurate I2C temperature/humidity (Si7021) and atmospheric pressure (BMP180) sensors. Credit goes where it’s due – this was inspired by this forum post and its author mr. A, but it’s somewhat different than the one presented there. There is a sample sketch to read the data from this shield, schematics is at the end of this post.

Some of the features:

  • –40°C to +85 °C temperature range (Si7021)
  • ± 3% RH (max) 0–80% RH humidity range (Si7021)
  • Best of all these sensors are very low power!
    • The Si7021 has an active conversion consumption of 150uA and standby of 60nA, and BMP180 ranges between 3-12uA in active mode and 0.1uA in standby.
  • Very Fast sample times, far superior to sensors like DS18B20 which require a long ridiculous sample reading time of up to 1s. By comparison Si7021 requires about 4-10ms sample conversion time depending on reading resolution (8-14bit)
  • The shield can be stacked on/under a Moteino (not a MoteinoMEGA)
  • Small prototyping area where you can add a little circuit, connect it to the Moteino pins through thin hookup wire
  • The BMP180 sensor also gives temperature readings that are pretty good but it is primarily an atmospheric pressure sensor, and Si7021 has a magnitude better accuracy for temperature
  • Onboard P-mosfet driven VIN/battery monitor. This is a VIN-4.7k+10K-GND voltage divider that can be enabled by setting A3 to OUTPUT LOW and reading the VIN voltage on A7, then disabling it to save power by setting A3 to INPUT (HighZ which disconnects any battery drain through this circuit).

These are much different than popular hobby sensors like DS18B20 or DHT11/DHT22 which are in a different price range and much more limited, so they are not meant to be general purpose sensors. These boards come at a price and instead they are precision sensors for serious weather monitoring enthusiasts and offer a set of features which makes them very battery/remote monitoring friendly and along with Moteino they can make a very small battery operated node. There is a battery friendly sketch available.

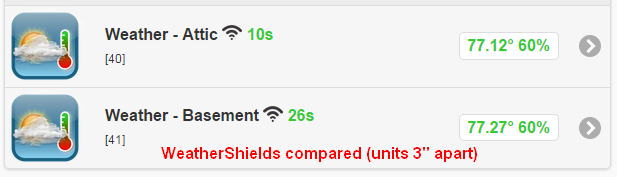
Comparing readings between 2 units:

This is how they look fresh out the reflow conveyor: