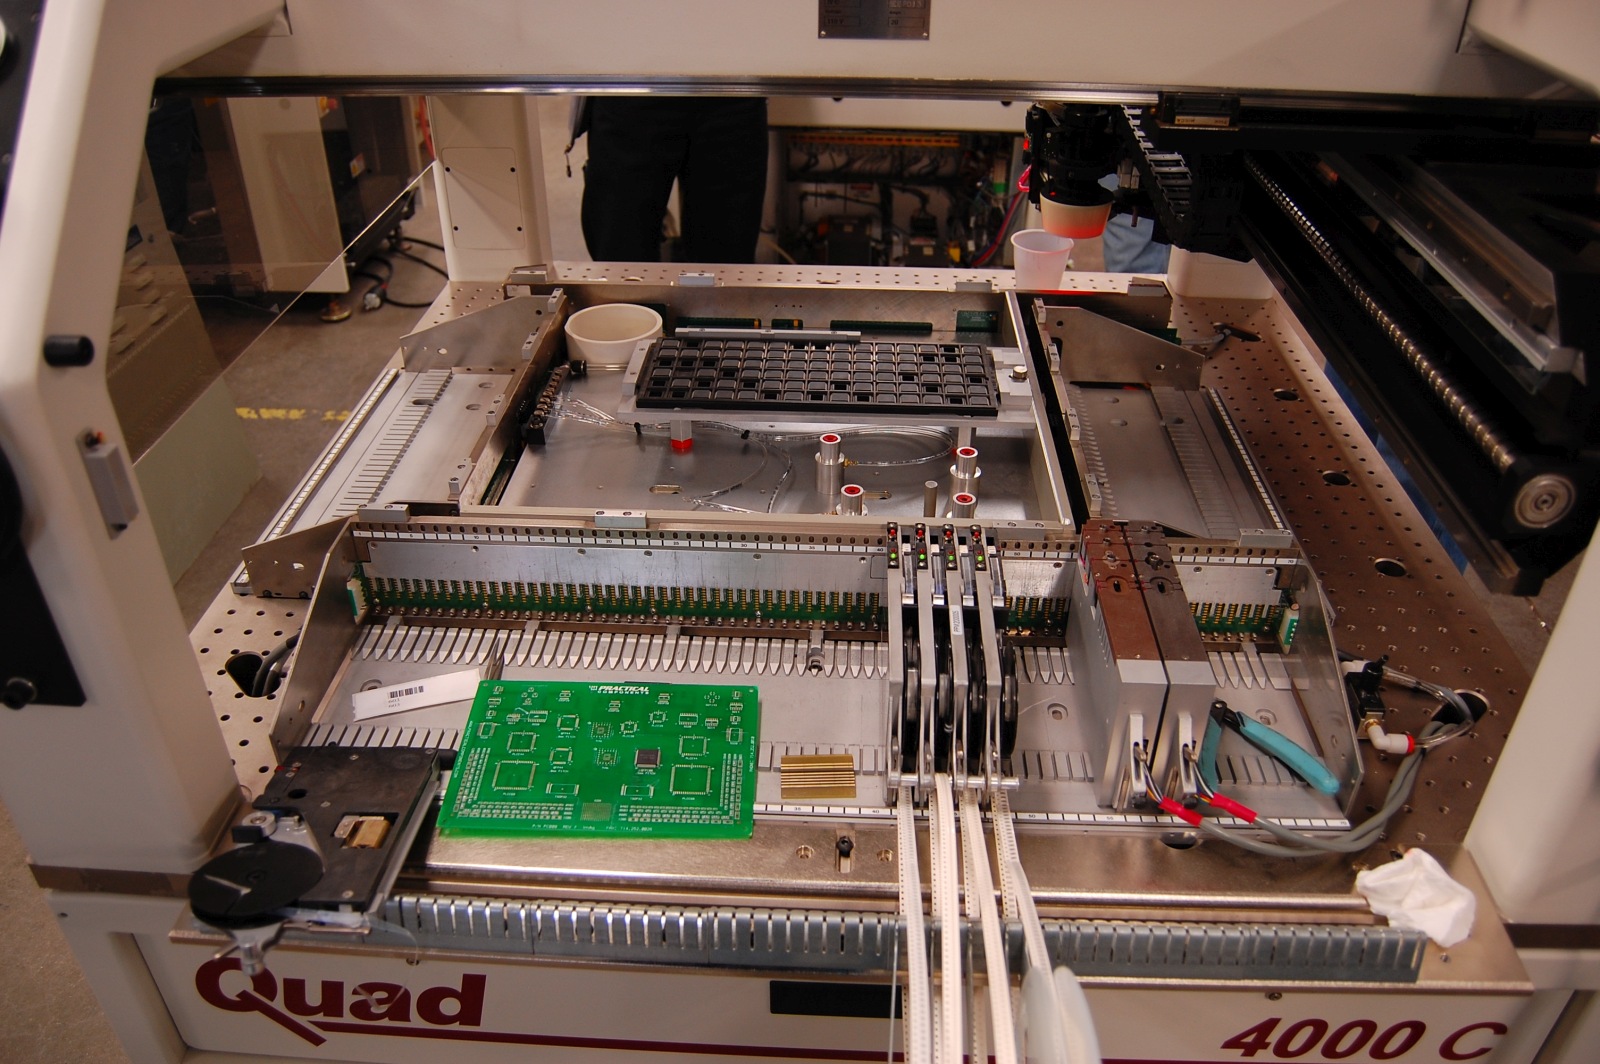
Pick and place – entry level options

Startups that manufacture electronics are faced with a limited set of choices when it comes to getting their hardware assembled. Each of the methods below have an array of possible approaches, some good some less so. I will try to cover what I’ve seen in my quest, hoping this will be a good overview of what’s out there. If I miss details or interesting methods please let me know and I will keep this list updated. This is part one, where I look at options of assembly without getting into a real commercial pick and place.

Doing it manually. Everybody started here, including Adafruit, Sparkfun and others. It’s great and fun at first and you learn a lot about surface mount technology (SMT) and also gain respect for how hard quality assembly really is. And we’ve seen countless ways people do this around the world. Some spread paste with a toothpick or dispense with a DIY syringe, then place parts with tweezers. This works for about 5 minutes before you go crazy, especially if you go smaller than 0603. Others laser cut mylar stencils to speed up the paste deposition. I etch my own stencils from soda can aluminum, this is fast and works great. For placement I’ve seen people make some fancy ball bearing jigs to help them move their hand, a bit better.
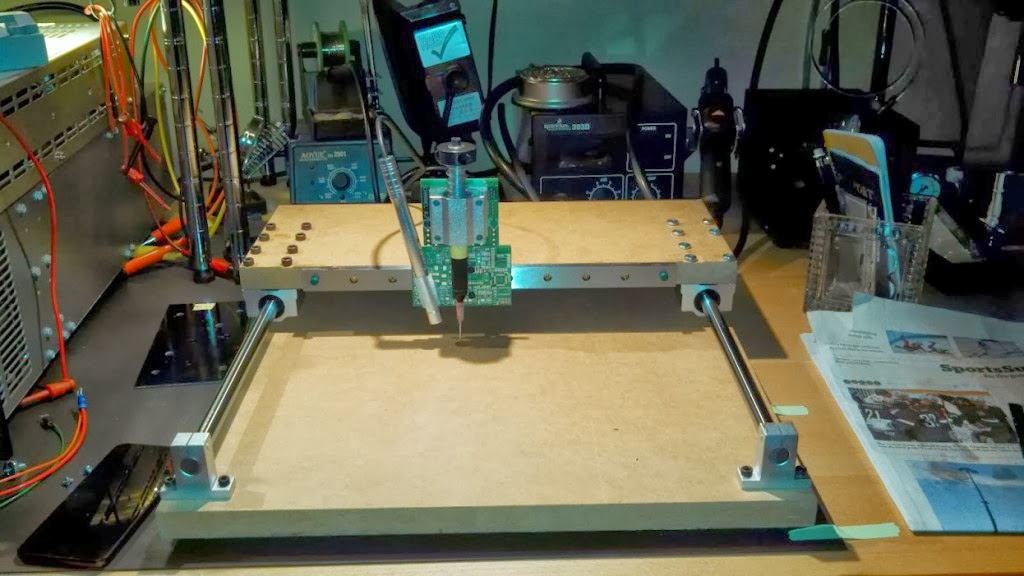
This is very cool and I almost did this myself but I think it’s overkill and a bit slow and … more expensive than it needs to be for what it does, but I can appreciate the effort of its creator. One advantage of this fixture is the ability to better hover over larger PCBs while placing. FWIW the maker even went as far as mounting a camera to help placing the parts, a nice touch, but looking at his video of it in progress the angle of the camera looks weird and looking away on a monitor when you work with your hands is what cuts the speed. Here’s another one of the same kind for reference. I do the same as these, only probably faster, with my aquarium pump pick and place (hold your laugh for a moment there) which cost me about $20 in parts, took about 30 minutes to make, and has full stereo vision – my eyes, can’t beat that for the price. I like to brag about this method not because I’m using it, but because it’s probably the best 100% manual method I’ve seen. Why you ask? I can do up to 7-800 CPH (measured!) with it on less complex boards. The only downside is obviously having to sit there all the time, with some neck and back strain, and the part alignment is less than ideal, but paste reflow really helps. I’ve assembled many thousands of PCBs this way, it works nicely and gets stuff done, but it’s not great. I wish I spent all that time developing new projects. So what is better than this?
Continue reading →

PCB trivia – can you spot the short?

Ah the joys of manufacturing …

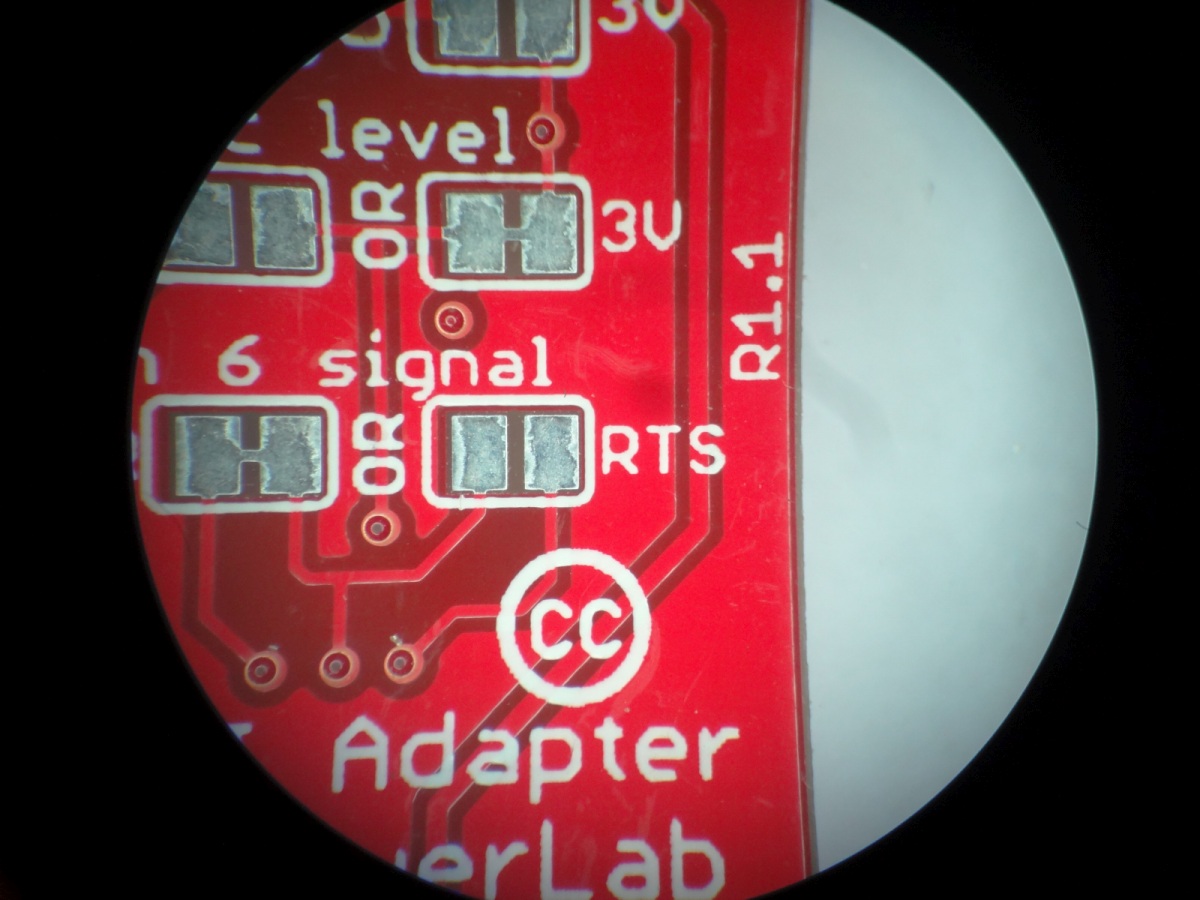
This one drove me crazy, no short at a close inspection. But I was determined to find it. I ended up desoldering almost all components off thinking the short is under some cap or resistor, but the short was still there. I had to pull the microscope to track it down. Here’s a shot of the PCB through the scope. Can you spot the short?

PPM visit and Quad IVc/4000c pick and place demo

In an effort to deliver truly meaningful and comprehensive content, I will write a few articles about pick and place machines and SMT assembly, after many months of trial and error with various methods, in hope to help others who may want/need to get into SMT equipment and assembly. The focus will be on pick and place machines, my observations, what I learned in my prolonged research into pick and place machines over the last year, what some people say, what some companies end up choosing and why, what to look for, what to run away from, etc.

I first saw the article about the Quad IVc pick and place on Ohararp.com and was curious to see this machine up close.

We visited PPM (Precision Placement Machines) some time ago and was able capture a few of the cool things we’ve seen there. This video shows a demo run and feeder setup on a Quad 4000c (Quad IVc upgraded to Windows 7).

I really took a long look at this machine and that’s why I took a day off to go out there (they are truly out in the country). Unfortunately there aren’t many resources on the web about these machines, at least not high quality pictures or videos, so I hope this will change that at least a little bit. The visit was very much worth it and the great staff showed us around and throughout the PPM facility. There’s too much to say about the visit and I hope to make some time to post more pictures later so here are a few more photos of the tour. Later I will expand on our observations on the Quad pick and place.

For now I will just post this video showing the Quad 4000c in action. It illustrates how the machine dispenses paste, places a range of components and finally how a feeder is setup:

From china, with love: bad solder paste

Recently I was running out of solder paste and I’ve bought some chinese paste to try out from a (very) popular online electronics outlet. I think somewhere in the reviews or in one of the tutorials they say they actually use that paste internally so I got confident and the price was right (I guess… even though I later found the same paste on dx.com for under $5), about $14 for a jar of 50g which would last a long time. Great I thought, I’d get it in time to assemble more boards, without the insane shipping delays from china, so I ordered and got peace of mind.

A few days later I got it and I assembled a batch of boards with it and peeked through the microscope to inspect how it reflowed. Here’s what I saw:

bad_solder_paste

Holy cow! What happened? Tons of tiny balls of solder stuck in tons of solder paste residue. Not one of my best days, but certainly memorable. Continue reading →