Moteino with trace antenna

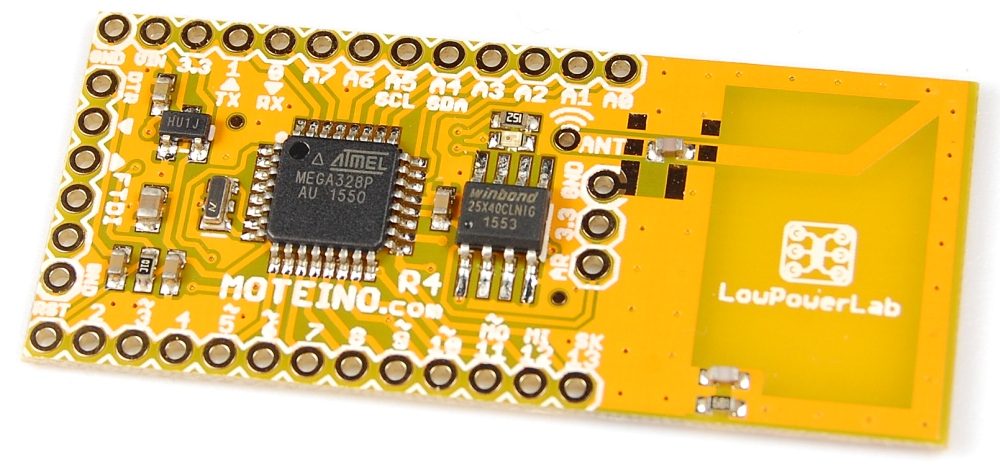
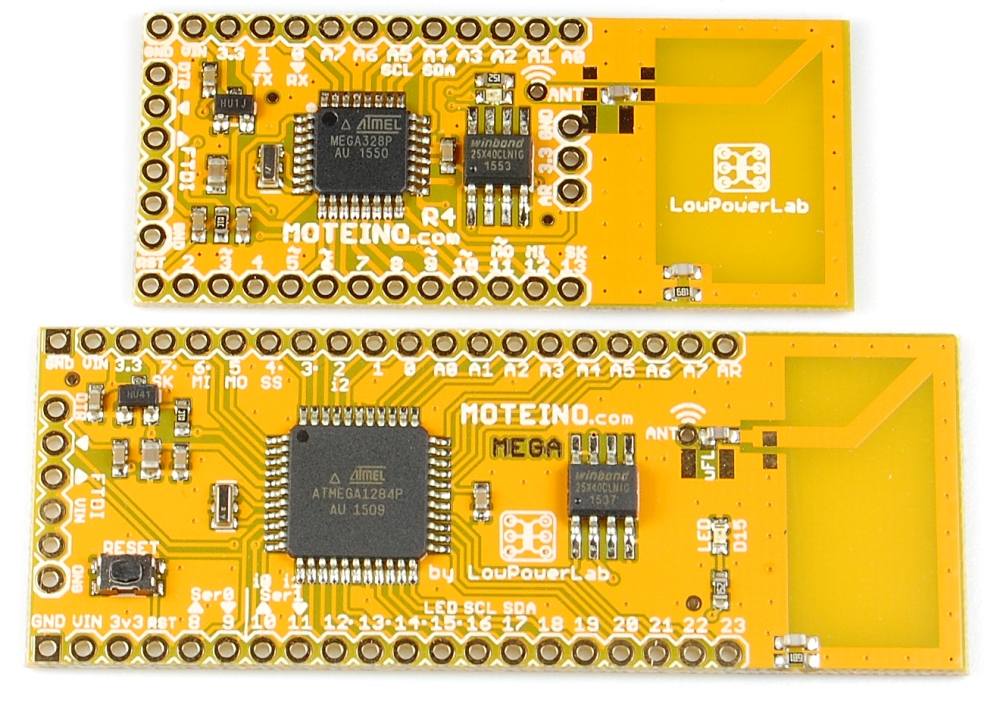
I had previously released a MoteinoMEGA with trace antenna, and there is now a regular Moteino with trace antenna. Everything is the same as the MEGA variant, except of course this is the atmega328p based Moteino, the most popular variant. The antenna is tuned to work in the 868-915 bands and should deliver very decent performance, close to the wire monopole. Here it is next to it’s MEGA sister board:

Meet Bobwi the dancing robot

I thought this project was too good to pass and I wanted to share in the blog. Forum user G4lile0 posted a funky little robot project that is more mobile and agile than it looks in the photos – it can dance like Michael Jackson! Watch this video to see what I mean:

He published more details in this this Github repository, and for the 3d-prints see this thing on thingiverse. Also see the original forum topic where updates be posted later. This is based on the educational robot Zowi, but instead uses a Moteino + bluetooth module and a 3d-printed case.

MightyHat R3

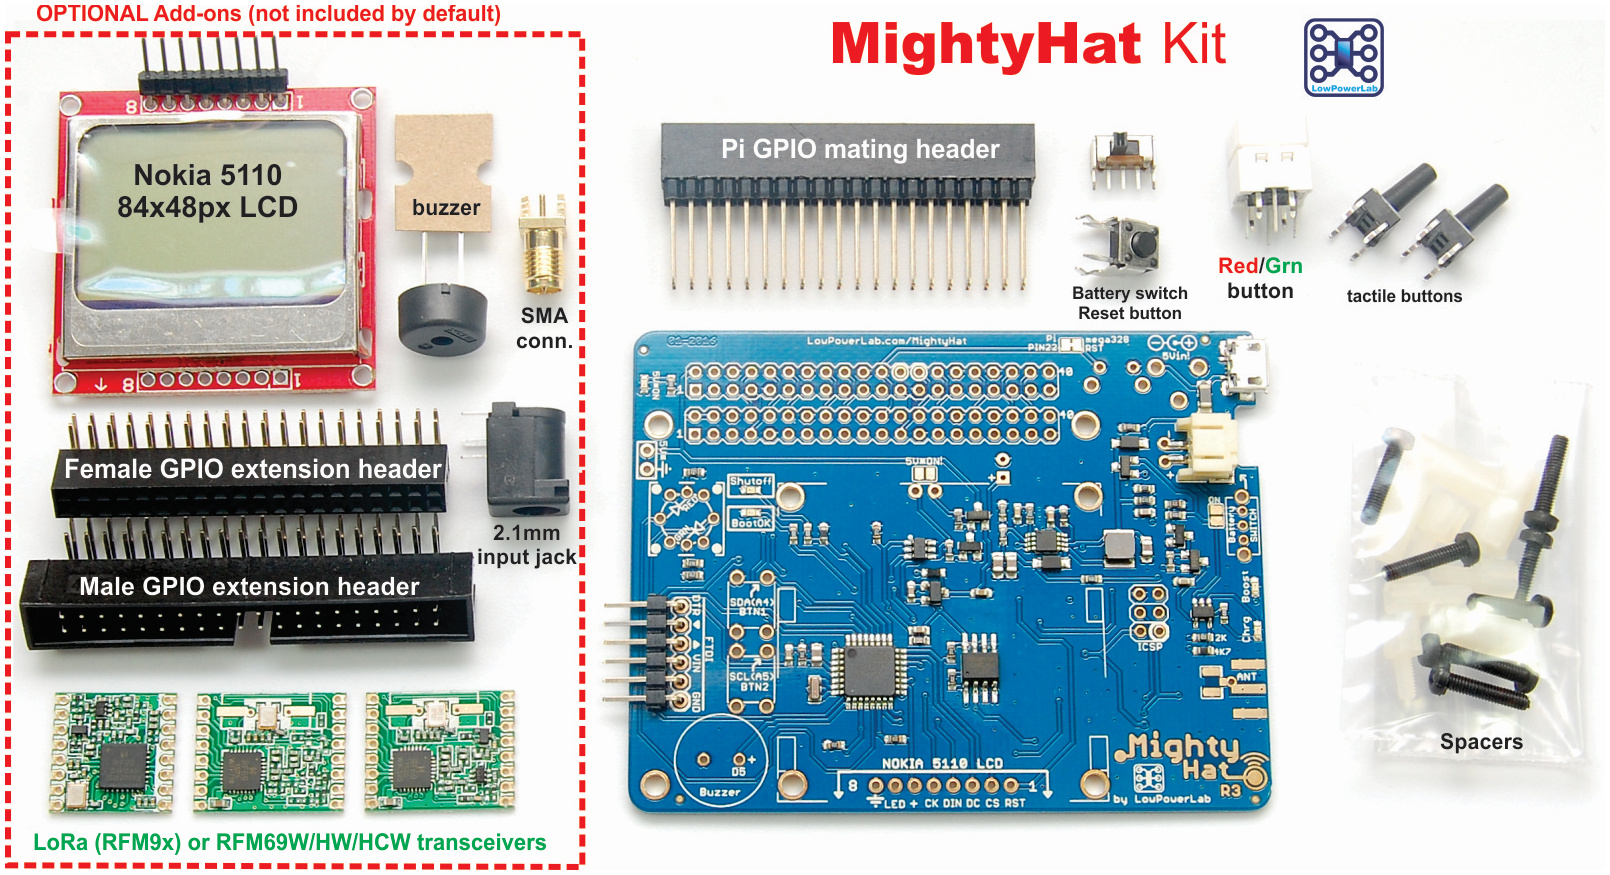
A new revision of MightyHat has started to ship out. Most everything is the same. Here is a rundown of the most significant changes:

  • the slide switch that cuts off the battery is replaced with a more robust hooded switch that also has a longer slider which can reach out of a 1/8″ thick acrylic case
  • The RST pin of the LCD is now connected to the RST of the atmega328, (previously wired to A1). This saves the A1 pin and resets the LCD whenever the atmega is reset. This is the only change posted in the RFM69 MightyHat sample sketch and I added a directive setting to make it easy to switch between R2 and R3.
  • enlarged the slot in front of the battery connector for easier wrapping of the battery wiring
  • added a capacitor footprint on the 5V* output rail. This makes it easier to add more capacitance to the boosted voltage when needed.
  • other various cosmetic and silkscreen adjustments

John’s Gateway Deep Dive #2: Utility room node

I’m pleased to share another great video from John’s DIY Playground who has posted a detailed overview of his utility room node that can report the dryer status, detect water leaks and control his water heater. A nice example of not only surveillance but also control from a responsive interface he built on top of the Moteino Gateway stack. It’s quite a thrill to see other people innovate and build new truly useful things using some of the hardware and software building blocks I’ve created. He shares his project’s state diagram, explains his code, shows the KiCad design he made for integrating all the parts in a compact design, then moves along to install details and a demo of it in action. His adapted SMS-when-dryer-is-done event notifies him when the clothes are dry and the dryer ready for a new load, nice touch John.

MoteinoMEGA with trace antenna

Over the past few months a friend has helped me create a MoteinoMEGA variant with a trace antenna tuned for between 768Mhz to 1.16GHz. So this should be great for 868-915mhz. I’ve tested this variant myself (915mhz) and I was surprised how well it performs compared to a wire monopole (which will still be better given the type of antenna). I did not do extensive testing but I am pretty confident this turned out as a great antenna and I am offering the remainder of this batch for those eager to have one and perhaps do more testing on their own. Depending on the response I may or may not ever make more of these, we shall see. The same antenna could be used with any other Moteino but I want to see the response of the users before I invest too much capital in new batches of Moteinos. The ANT pad and u.FL footprint are still there if for some reason the user wants to cut off the trace antenna and use one of those instead with a monopole or different antenna. Otherwise everything else is the same, well, except the yellow soldermask which has a nice orange hue from my new PCB supplier. I will offer these with RFM69W/HW in 868/915mhz or without a transceiver, your choice. Enjoy.

Wireless Programming just got 50% faster!

The Wireless Programming GUI app that I introduced in an earlier post is now at version 1.2 (get exe here). It features the ability to bundle up to 3 HEX file lines per RF packet (instead of the default 1), which yields a significant transfer speed increase. Let’s just do the TL;DR first and gaze at the results of transferring a compiled sketch of 13,858 bytes:

  • running with 1 line per packet (the same as before) yields 866 packets and ~43s OTA time:
  • running with 3 lines per packet yields 290 packets and ~18s OTA time:

That’s an average 58% speed gain, not too bad!
By comparison, the same sketch uploaded directly via FTDI/serial takes about 13s, so much closer to that figure than before. I think a few other techniques could be used to squeeze yet more speed (increasing RF bitrate!) but that’s for another day.

Note that the same exact data is transferred, except in fewer longer packets. I had to make some changes to the WirelessHEX69 library to support these longer packets. Also I fixed some bugs that emerged during this development, see the github commit for all the changes.

To support the new GUI v1.2 speed increase you only need to update your WP programmer Moteino with a new version of the WirelessProgramming_gateway sketch (to refresh the WirelessHEX69 code) to make it support the faster WP speed (ie also update the WirelessHEX69 lib!). Everything else is completely backwards compatible, and you can use the new GUI v1.2 with an older WP programmer Moteino if need be (1 line per packet only), and also all old target nodes that are OTA/WP programmable are not affected at all and can be updated at the new speed. FWIW you can actually use 1 or 2 (not sure why you would) or 3 lines per packet (the new default going forward). Experiment and see what your own speed gains are! Please report any bugs or issues in this forum!

Gateway software update (v8)

There is a new gateway release, “V8”. The sources are at Github. The download link to the latest image is posted here. It contains several updates and new features, bug fixes etc. Most notably:

  • there is a new settings page accessible from the main dashboard. This allows you to edit your settings directly from the GUI instead of manually in the settings.json5 file. I also added a button on the settings page that allows restarting the gateway app, for such cases where this is useful (ie some settings require this, like changing the serial port). There is not a lot of validation done on the settings page, so edit these mindfully of that. The assumption is that you are not trying to break your own server. Also some settings are not exposed, so they will not show up in the GUI, and some are not editable – these will show but you are not supposed to change them. if you still need to, you can manually change the settings.json5 file any way you want on disk, but keep the formatting/nesting of the objects since that format is assumed in the new gateway app release. Here’s a peek at the new UI:
  • I added a new setting called genNodeIfNoMatch (boolean) which can disable new node creation when data is received from a node but no metric is matched to the metrics definition in metrics.js. If you set it to true, a node is added even if no data can be matched to a meaningful metric (node would show in the UI).
  • some new metrics/events were added/improved
  • logs generated by the gateway app are now rotated and archived with logrotate in a new logs subdirectory (if you manually upgrade you need to mkdir /home/pi/gateway/logs). To facilitate this there is a new /etc/logrotate.d/gateway config file that controls this feature. This means the log is kept under a size and history limit to avoid it growing indefinitely.
  • avrdude is now installed on the image so it would support programming MightyHat with a new HEX sketch. Instructions for doing this are on the MightyHat page.

Essentially 4 files have changed: gateway.js, metrics.js, settings.json5, index.html; one file was added: /etc/logrotate.d/gateway. I also posted a MightyHat blueprint DXF case for 1/8″/3mm acrylic (the green areas need to be etched rather than cut).

As always, the image contains pi:raspberry default credentials (change it with passwd) for the main pi login and for the http authentication (make your own .httpasswd file). If you got an ATXRaspi or MightyHat you need to uncomment the line running the shutdowncheck script in /etc/rc.local, to enable power button control. You may also want to create your own secure certificate and setup your wifi. Please let me know if there are any issues or bugs with this release.

John’s Gateway Deep Dive #1: Configuration

John’s DIY Playground has posted a new video where he goes into more detail about how the gateway main code files work and how to start extending the interface and in specific the nodes/metrics that you see on the dashboard. Great video and definitely worth checking out especially for those who want to better understand the inner workings of the gateway code, thanks John and keep it up, looking forward to see more of your setup and hardware!

Wireless Programming desktop app

Finally, it’s here – my own Windows desktop app for Moteino Wireless Programming, download the exe from here. Not sure why I didn’t make this sooner, maybe because the command line invoked python script version works perfectly fine and also maybe because there was already a vb6 version built by someone else. But, it’s time to dust off my .net GUI skills and put C# to work. And the result is this:WP1

Not much to it really, a mere 300 lines of loosely written code, last (mid)night. Here’s a rundown of the features, I tried to make this a bit more useful and intuitive to use than the command line python script, so that would be the main attraction other than being a GUI:

  • gives you a list of available serial ports so you don’t have to guess (you still have to know which serial port your wireless programmer Moteino is connected to)
  • allows you to type/paste or browse for a hex file
  • allows a numeric target node ID
  • once all settings are populated with valid info, the Start! button is enabled
  • upon exit, it saves the settings to registry and attempts to read them back in future launches

Clicking Start! will do some validation and start the OTA protocol just as the python script did it, but also gives you more visual feedback with a progress bar at the bottom:WP2

I will potentially expand this to allow remote wireless programming through a tcp port, just like the 3rd party vb6 app, but I doubt that will be very popular so I am sticking to the basics for now. If there are any bugs let me know.

This is it for 2015, see you on the other side of 2016!