
Here’s a video showing how you could panelize finalized PCBs in Eagle CAD. Some PCB services will charge a lot to route boards individually, but may offer fixed size PCB service (like ITeadStudio’s 5x5cm, 5x10cm, 10x10cm etc), where you may panelize more boards and later cut them yourself to save money and take advantage of most of the board space. Otherwise you may have a 5x2cm board in the middle of a 5x5cm panel, they will route it for you, but more than half of the space you’re buying will be cut out and wasted. So, of course, why not panelize it and later cut the PCBs yourself?
Moteino manual pick and place SMD assembly
Quick video of how I assemble Moteinos. This includes using a home made metal stencil to spread solder paste on the pads and a manual pick and place apparatus for speedy placement of SMD components. In a future post I will show details about this tool.
UPDATE: See this post for a video on how the pick-and-place apparatus was built for less than $20.
ITead Studio PCB service review
Here’s a quick review of some PCBs I ordered from ITead Studio.
While some of the cosmetics of these PCBs are not top quality, electrically they appear to be OK. I assembled several dozen of these from this batch and all the Moteinos passed programming and testing.
Quick update: Moteino back in stock
A new revision of Moteino is back in stock. Parts and PCBs finally arrived after a long delay which was out of my control. I should be able to fulfill the preorders in 1-2 days and then be able to ship new orders.

There are 2 obvious changes to Moteino:
- they are now Green
- they contain a new footprint that can be used to solder Atmel serial FLASH memory. This can be handy for data logging and/or other interesting applications that I have in mind for Moteino in the near future.
I also have the 915Mhz version of the RFM12B radio in stock. I have done some testing and was very surprised to see this radio performs just as well or better in certain circumstances. The 434Mhz version still seems to have a slight advantage in penetrating obstacles.
Stay tuned for updates on these changes, and more on the 915 vs 434 frequencies.
MailboxNotifier – Moteino based mail event notifier
For a few weeks I kept tweaking and playing around with my new mailbox event notifier, based on Moteino. It all started as a joke, then when I saw it actually works, I decided to beef it up and do a writeup and a video:
UPDATED hardware for this project: I modified the circuit and added an enclosure and battery voltage readings. Also a standalone LCD receiver. More details here. The rest of this post is for reference only, you should follow the details in the new post.
UPDATED Schematic: For stability you should add a 10K pull-up resistor between the OUTPUT and POWER pins of the hall effect sensor. I omitted that in the video and added that later. Also a battery POWER switch is very helpful. You should always disconnect POWER from the battery when you try to load the program to Moteino using your FTDI adapter!
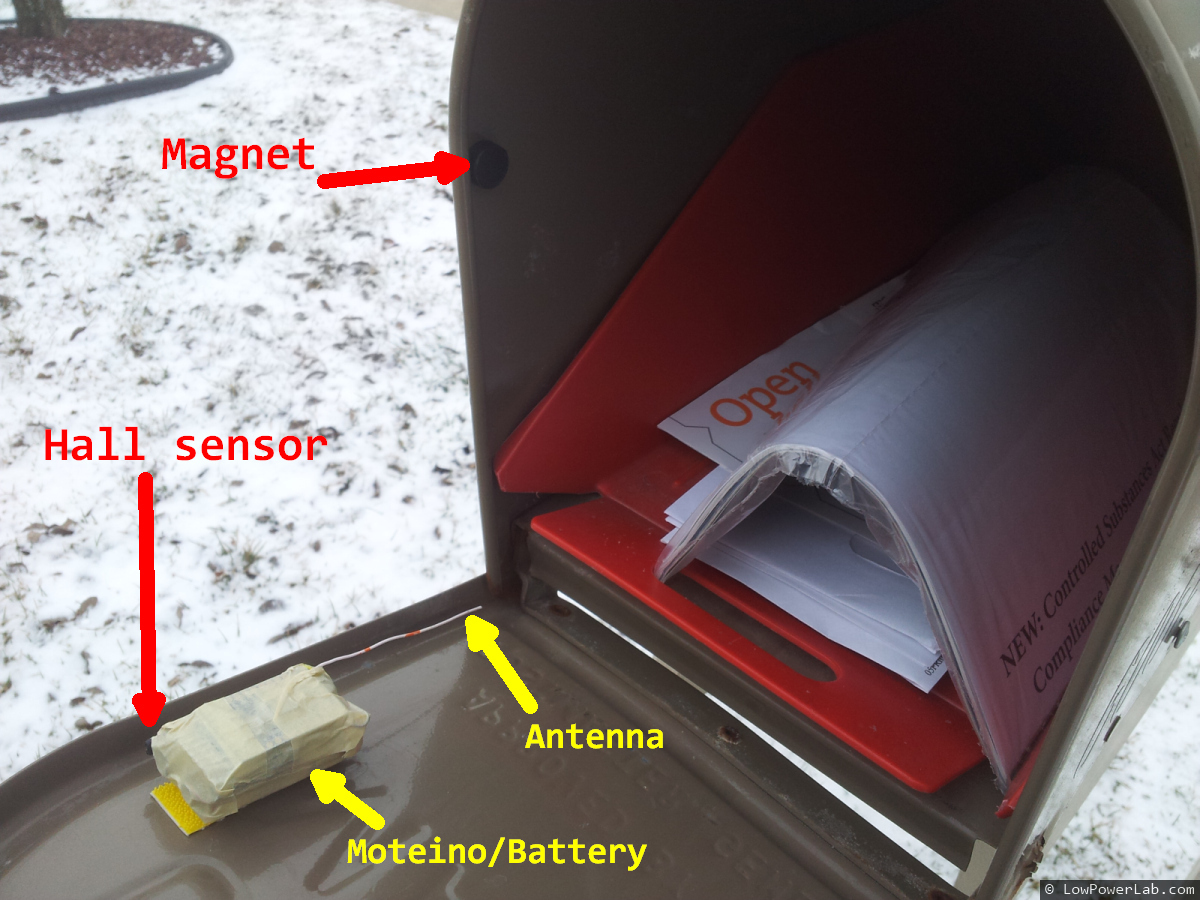
The details are simple. A hall effect sensor detects a magnetic field from an earth magnet. The earth magnet is placed inside the mailbox, while the Moteino/sensor/battery pack sits on the door. When the door is opened, the magnetic field is interrupted, the sensor flips state and the Moteino sends a “DOOR OPEN” message, or “DOOR CLOSED” when it’s closed.
The hall sensor uses ~2.5mA of power which is a lot for low power battery operation. So I added a 2N3904 NPN transistor (driven from a digital pin through a 2K resistor) to switch the sensor off when it’s not being used. When I need to read the hall sensor, I just turn on the transistor, read the sensor value, then turn it back off. That brings the total power consumption down to to an average of about 60uA, so the 9V battery should last a long time. To save power overall, the Moteino “sleeps” most of the time and only checks for events every 250ms using an interrupt timer. Every ~5s it reports when the mailbox door was last opened and last closed. This way I can distinguish between these 2 events and tell if the door was left open , or if someone else is messing with my mailbox.
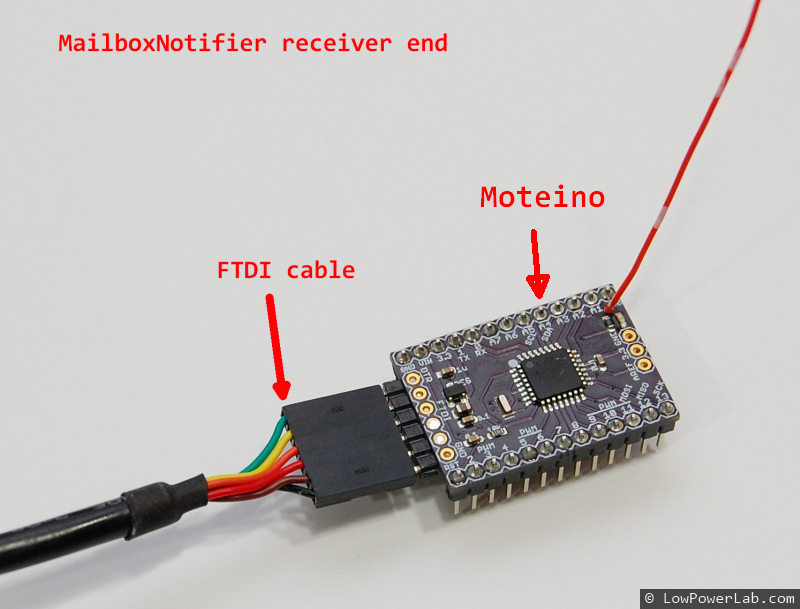
The receiver simply runs my RFM12B receiver sketch. It passes incomming messages through to the serial output. I can capture that on a PC or a RaspberryPi, running a python script which sends me an email or SMS message when a DOOR-OPEN message is received. This works great. To send an SMS, I simply send an email to my cell carrier sms mailbox, in my case that is [email protected]
The python code to send an email/sms from python, and the arduino sketches that run on the sensor side and receiver are in my GitHub repository.


Amazon checkout surprise
I wanted to get a wireless adapter for the RaspberryPi.
Amazon had the right one, for ~$22, free shipping, pretty good deal. So I add it, shop some more then I get to check-out.
Suddenly I get this, and it doesn’t look like such a good deal anymore. Yikes:
DIY SMD metal stencils – the definitive tutorial
In previous posts (here and here) I described my efforts and research to develop a DIY method to make good quality SMD metal stencils at home. I have since experimented some more and I believe I found the best method (so far) to do this with very cheap materials, yielding very good results.
Since transferring the toner to the soda can aluminum alloy was the most challenging part, I kept experimenting with different transfer mediums and other ways of possibly facilitating and perfecting the transfer.
Finally the solution is here: consistent, repeatable, “perfect” toner transfer, every time.
RFM12B air transmission speed calculator
I uploaded an excel spreadsheet on Github with a table of achievable air transmission rates for the RFM12B radios, including code instructions for my RFM12B library.
You can tweak these to achieve better range or better penetration. It’s hard for me to provide specifics since in my case the default 38kbps works well. This guy on the jeelabs forum achieved much better reception by lowering the kbps to ~9kbps in his environment.
If you use this and get interesting results, I’d love to hear about it.

Moteino sold out!
The first Moteino batch has just sold out!
Not too bad for 5 days since the store launch.
I ordered another PCB batch and more Moteinos are expected to be ready for shipping on Monday (Feb-18). Until then you can pre-order if you wish or just wait for more updates.
Thanks everyone for all the comments and support!
Custom Optiboot for Moteino
The Moteinos have an LED onboard. But it’s not on D13 as regular Arduinos, instead it’s on D9 (PWM pin, can be faded). I’d like the LED to flash when the bootloader starts and when Moteino is programmed from the Arduino IDE. So I rebuilt Optiboot for this purpose and all future orders for Moteinos will come with this tweaked Optiboot that will make use of the onboard LED when you reprogram it.
This is a video of how I program and test Moteinos before I ship them to you, also showing the updated Optiboot in action: