Wireless Programming GUI v1.6

The WirelessProgramming GUI is now at v1.6. You can find and download it here. Please note it is no longer part of the RFM69 library, but has been moved into its own WirelessProgramming repository. Here are some changes:

  • protocol improved to support variable HEX record length
  • various other minor bugs fixed
  • removed the logging delay in v1.5 since it was causing some glitching

Since v1.5 (release notes here) you may know  that this OTA GUI can also invoke the OTA.py script which is included with it. This way you may customize the OTA.py script to your own needs, the windows GUI uses the same algorithm. The GUI includes the IronPython runtime and libraries required to invoke this python script right from the app. You may of course simply use the OTA.py script independently if you’re so inclined.

I spent a few days doing testing and I would like to invite Moteino users to try this new version and report any bugs via the contact form.

For those interested in future releases – last year I developed a new OTA algorithm which cuts the upload time dramatically. I mentioned this briefly in the forum but I got distracted in many other directions and it’s not finalized. It is more complex and needs a lot of testing and fine tweaking. It was originally intended for transferring small files via non-wifi subGhz transceivers (RFM69) and would need porting and adjustments for OTA purposes. I would like to hear feedback and see the level of interest about wireless programming of Moteinos (aka OTA programming). Feel free to drop a line and share your experience so far and change requests.

DIY Moteino guide

I posted a short illustrated guide for making your own Moteino from SMD components. It also includes details how to burn the bootloader and fuses. Check it out here. Thanks and credit goes to forum user LukaQ for his contribution of the images and test sketches in this guide!

iPad keyboard 3D printed holder replacement

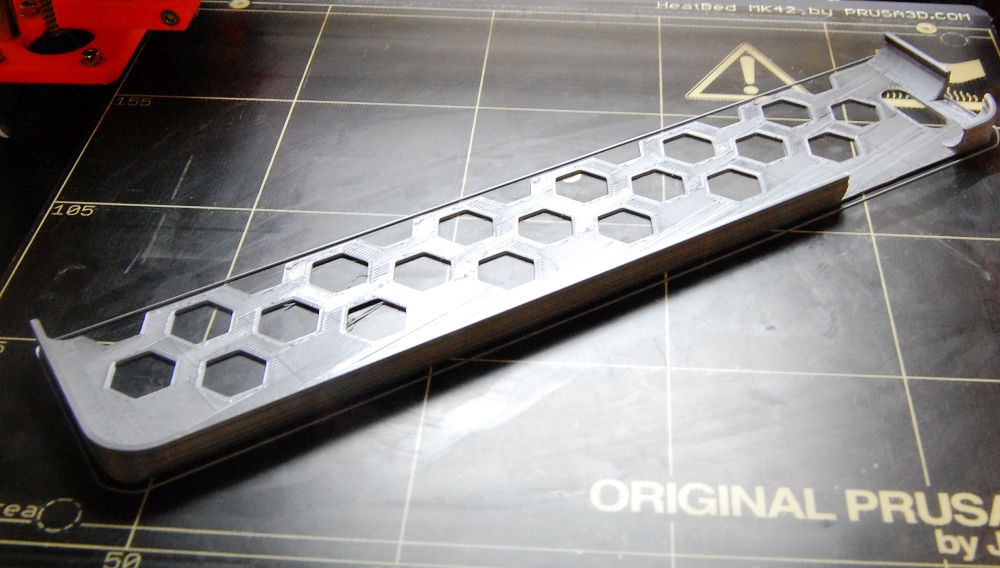
We’ve had two of these iPad keyboards and they are quite nice other than having a very poorly designed corner holders. Needless to say they broke within just days after purchase, nothing surprising with kids in the house. I haven’t thrown them away and kept them around for years hoping they might be useful some day. That day has come and I will show you how a simple fix has brought life back to these sad and lonely keyboards!

After sawing off the broken parts, I came up with two designs. One is a replacement for the broken corner only and leaves the other original corner. The other extends on the entire top side and replaces both the original corner holders. I used this honeycomb design to save on material and not spend eternity redesigning the wheel. I modified that model in the following ways:

  • I made the bottom thinner since it was too thick
  • I sliced away the case to create the corner version and top side only
  • I cut sliced away the casing where iPad buttons are to allow easier access

No rocket science here, printed these in PLA, some super glue cement the printed parts into the old cases.  I will let photos tell the story. Continue reading

3D prints remover from scrap stencil

After you finally figure out the right settings and calibrate your 3D printer head and it makes prints that stick very well to your printer bed, it’s time to figure out how to remove the prints without damaging them. I went to HomeDepot to find a scraper but all are too thick and very rigid, and … $5+. I can do better.

There are many designs for a DIY print remover and most seem to be designed for razors. I see a few potential problems with razors:

  • too small
  • the utility knife blades are not flexible
  • if you’re not careful they can cut/damage:
    • the print bed if you’re not careful
    • you or loved ones 🙁

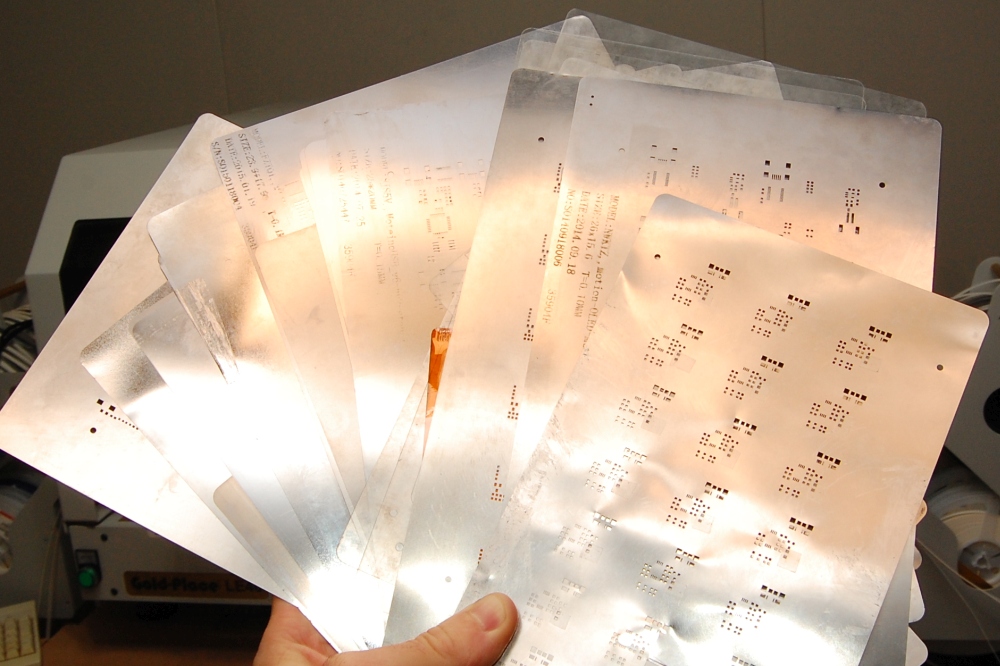
I have tons of old stainless steel stencils of various thicknesses, and all are very nice and flexible, perfectly thin to squeeze under a print and pry it off the bed.

I tried using one bare handed a few times and while its not as dangerous as a razor it’s still thin and if I try long and hard enough I will get injured. Sure you can dull it but I don’t like how short razors are, I wanted more of a proper scraper size. Continue reading

Moteino/production board testing – IDE vs. avrdude

To those that have concerned over the utility of my IDE add-on’s utility, I would like to follow up and give an example of production board batch testing at a very simple level. A simple pogo (spring loaded probe) jig is used to only power and access essential peripherals of a target board, and among other things upload a fixed test sketch to ensure basic functionality of the board. Since this is done repeatedly, it’s desirable to have a more automated way of doing this over and over again to save time. I show how we can edit some IDE settings for a target board to skip verification, and also how you can use avrdude to quickly upload sketches without the IDE’s compilation and optimizations overhead. The same would apply for bossa for SAMD or whatever upload tool your target board might be using). Let me know your thoughts and suggestions!

As an update – I’ve always just used avrdude for quick uploads but a very worthy mention suggested by a viewer is using avrdudeSS which is a very nice GUI for avrdude, check it out!

Component sourcing and Mouser vs. Digikey Pros and Cons

This post is about mainly sharing the experience of a small maker business sourcing genuine components right here in the USA. Sourcing and stocking the right components in the right quantities is one of the finest balancing acts in a small electronic manufacturing business. That’s because keeping large stocks of parts has not only tax implications but also drains funds from other efforts faster than you may realize. If you’re a beginner and need some tips, here’s some experience that might save you a little sweat and hopefully a few of your hard earned dollars. I might will update this article in the future as more things come to be realized in this area of the business.

My main parts suppliers since LowPowerLab‘s inception were Mouser and Digikey. Both are great in their ways which I outline down below, but there have been some surprising downside quirks as well. Hey it’s a little hard to get motivated to write only about awesome things, usually the bad stuff triggers reviews. But I’ll try to keep this objective and informative. If both were great at everything then there would be no reason for competition or even having multiple suppliers. Monopoly is a bad thing in supply chains, and I hope these companies will continue to exist as separate entities and not eat each other in some monster acquisition deal.


I have mainly 2 types of orders. One type is the “small value” prototyping batch of components or small run custom batch for a client which I usually place at Digikey due to their more comprehensive offering. Even this can run into the lower hundred dollar range depending on the project I’m putting together, but the average is under $100. Then there is my normal run, what I call the periodic replenishing orders which are in the thousands of dollars range. Whenever I run low on certain parts, I place them in the cart, and they stay there until I’m ready to complete the order. It’s unlikely for me to use fast shipping, so I usually go with ground services. I even use USPS for the real low count prototype orders.

Before I get into my sourcing experience with these suppliers, let’s take a quick look at the pretty incredible state of affairs with respect to passive component sourcing in Q1/2018. So as a quick primer side story about parts sourcing – if you’re a maker you’re already familiar with the astronomical passives lead-time situation. Just the other day I was scrambling to find 0.1uF 0603 caps (which along with 0603 1K 10K resistors are the most popular and numerous parts in my designs). They  nowhere to be found these days due to extreme factory lead times for new passive stocks. I ended up paying $210 this week for the last 15K reel of cheapest 0.1uF caps (normally <$20 for a 4K reel). Yup, it’s that bad!

Neither of these companies are directly at fault for this, at least not for the supply chain. But they control their dwindling stocks pricing of course that’s for sure, and why not make a buck while in this dire straits, right? This week I made the mistake of keeping some reels of basic passives in the cart for a day or so until I completed my order (at Digikey first then at Mouser when Digikey 1) doubled the price then 2) went from a comfortable 16-24,000 parts to 0 stock. No problem, Mouser doesn’t mess with pricing right? Then Mouser did it too, but too late for screenshots to prove it! I should have just bought those on the spot knowing everyone else is trying to buy them too. Don’t procrastinate silly!

Anyway let’s now go ahead and imagine a little fable here:

In general as companies (not necessarily these) get larger they tend to become more imperialistic, trusting their dominance on market share confidence and getting preferential with customers depending on their bottom line impact. Small customer care becomes secondary. Me and you are probably lost in the background noise of annoying small customers, more so the lower the order value (more overhead per order for less profit!). Say you bought a few different SMD resistors, some switches, whatever else small value components for your latest breadboard project.

You buy not-overnight shipping, place your order sometime in the morning and expect them shipped in cut tape or whatever part spec packaging, before the same-day shipping 8-9PM cutoff time, well in time to get it for your exciting weekend project you’ve been looking forward to. But hey wait – who cares about your $19 order value, when there’s real customers. Think someone will walk the warehouse 5 minutes to count and cut your 10x 0603 resistor tape then pack your $19 order by cutoff time just because your order came in early? Have a question or concern? Go away annoying fruit fly, we are having some difficulties fulfilling the unexpectedly large number of orders in the last day, we will get to your order after the real customers and our interests get served.

That fable is a little on the extreme. But it get’s pretty close to reality actually when it feels like it’s happening to you, again, then again, and again. Continue reading

Mailbox notifier 2 year service

My mailbox notifier stopped transmitting the other day. It lasted almost 2 years since the last charge, with last reading at 3.56V. This was based on an old MotionMote R1 and Moteino R4, plus a chinese 2000mAh Lithium Polymer battery.  This device reports MOTION when mailbox is opened, along with a calculated LastOpened-ago metric and battery readings. Makes my life easy knowing exactly when there is mail or someone just opens it. And I can get IPCam snapshots if I need to when motion is reported. All very convenient. Continue reading

New SwitchMote RECOM supply and sale!


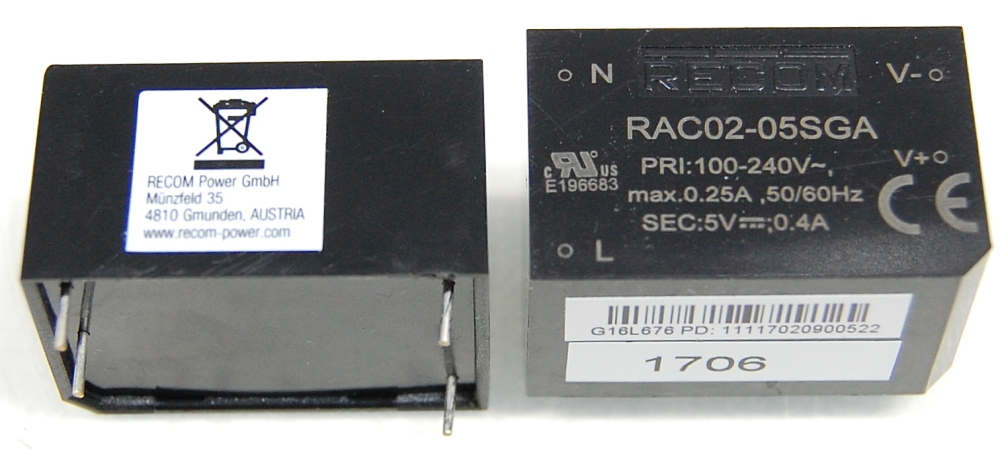
The RECOM certified PSU used in the wireless SwitchMotes was a pretty expensive part of the kit. This was sourced from Digikey/Mouser and used to cost around ~$11 in volume. There is now a new PSU with identical size and pinout, very similar specs but even more certifications, weighs less, lower noise, same Austrian quality. The really great part? It costs just ~$6.50 making the SwitchMote kits price go down!

The SwitchMote2x10A, SwitchMote1x30A and SwitchMotePSU kits are now on SALE, check them out!


Custom ArduinoIDE: Boards & Ports toolbar add-on

Have you ever done testing of lots of different boards with the Arduino IDE?
Were you frustrated with having to search your target board and port in the Tools>Boards submenu every time? Do this a few dozen times and you realize this is a major pain and time waste. Especially true if:

  • your boards menu is getting ever longer with every version and new package
  • with every new board there is a new serial port to select
  • you are in a hurry, make a wrong selection, get compile/upload errors, start selecting your board/port from scratch, face-palm!

I think if I add all the time I spent doing that in the past decade I could go on a short vacation in the carribean, wouldn’t that be nice!

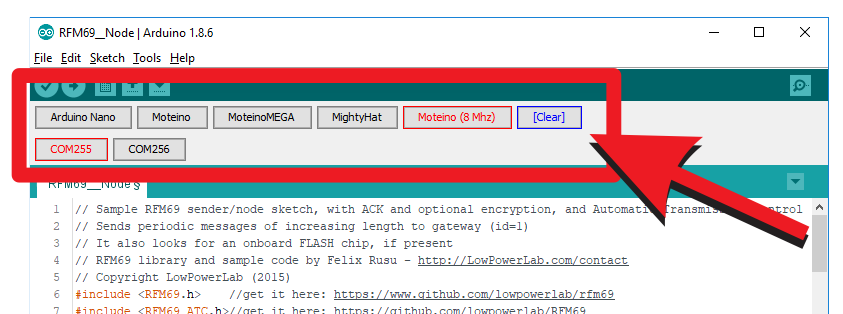
I spent some time dusting off my Java skills and understanding the Arduino IDE source code and made this little add-on toolbar:

Here’s a video overview of how this works:

Continue reading

Gateway app IP Camera snapshots

Wouldn’t it be cool to take a snapshot of your driveway when the garage is opening, or a snapshot of the mailbox when someone opens it, or a front door image when someone rings your door bell?

If you have an IP Camera on your home network, it most likely has an HTTP endpoint which can serve a static snapshot on demand.

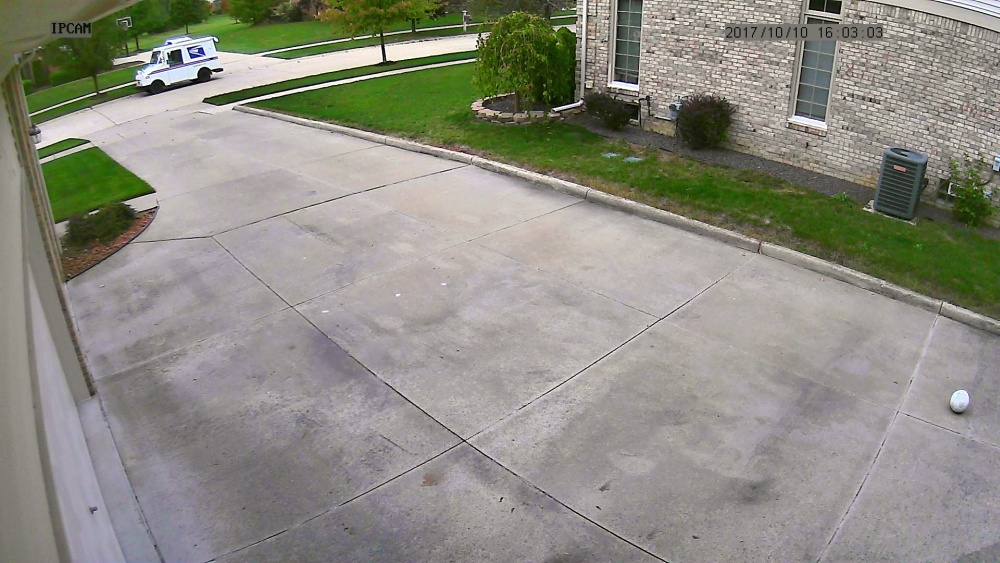
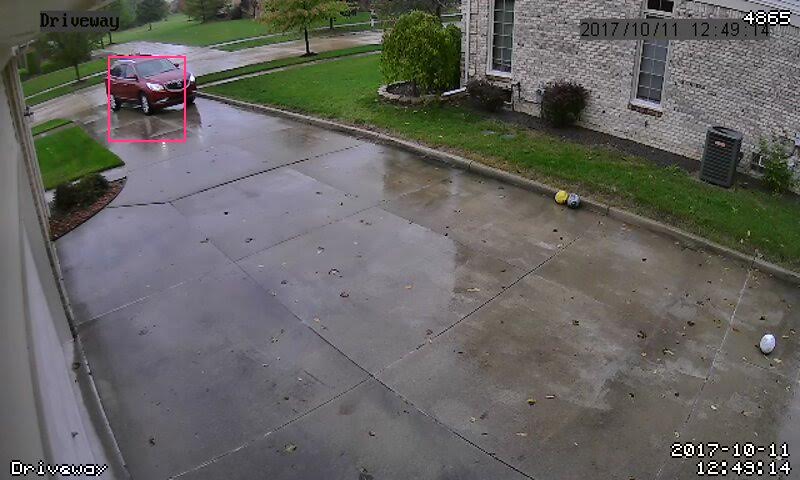
There is now support for a variety of such events in the Gateway app. I’ve added some examples for the doorbell when it RINGs, mailbox and motion motes when they report MOTION, and garage mote when it OPENs. The snapshots get attached to an email that is sent to yourself, so you instantly get an image of the event. Here is a sample email received when my mailbox (essentially a MotionMote) reports motion:

It’s the mail delivery so no issues:

In my case this camera mainly monitors the driveway, so I can have my GarageMote also send me an email when the garage is opened, here’s a sample:

This changeset includes a new setting called ipcam_snapURL that is overriden in the nodes which have such snapshot events. That way different nodes can request snapshots from different IP cameras. Otherwise the value is inherited from the general settings. If you merge this changeset locally, don’t forget to change the IP camera URL in the general settings, which should correspond to your IP camera’s snapshot URL – this should return an image, not a webpage or text/html page, or the attachment will be corrupted. Then, all nodes that override (ie inherit) this setting will display it in the node settings, where you can customize it for that node.

Here is a look at a sample mailbox node which includes the new event and URL setting:

And here’s the event and setting for the garage node:

You can mix and match to create other events based on the given samples. If you create your own variants, I recommend using the userMetrics folder to add new custom code, so the main app files remain unchanged and thus upgrading to new releases is easier in the future. Enjoy!