
Haven’t had much time to blog lately, too much stuff going on all fronts. That’s not to say LowPowerLab is idle, no no…. On the contrary the shop is keeping me busy and I have a few new projects I am working on. I am trying to bring a few kits to fruition.
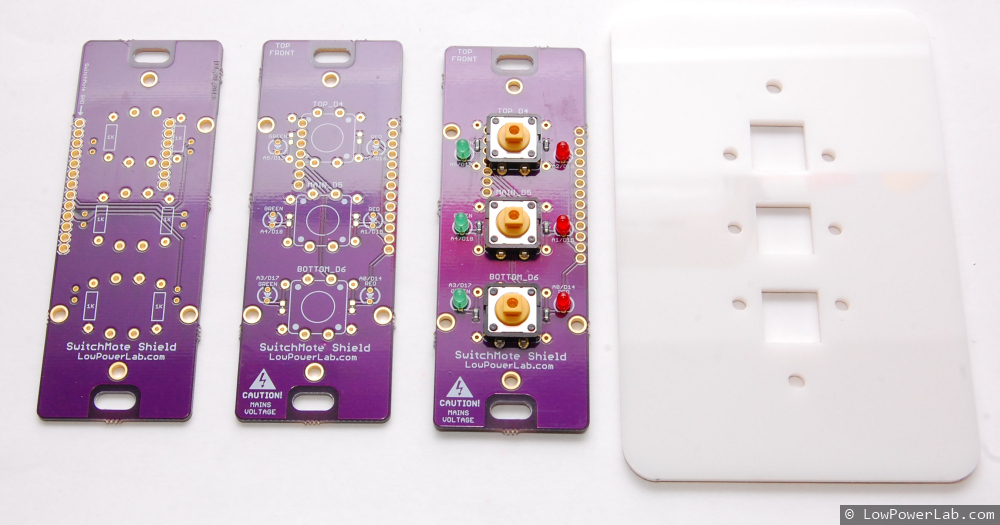
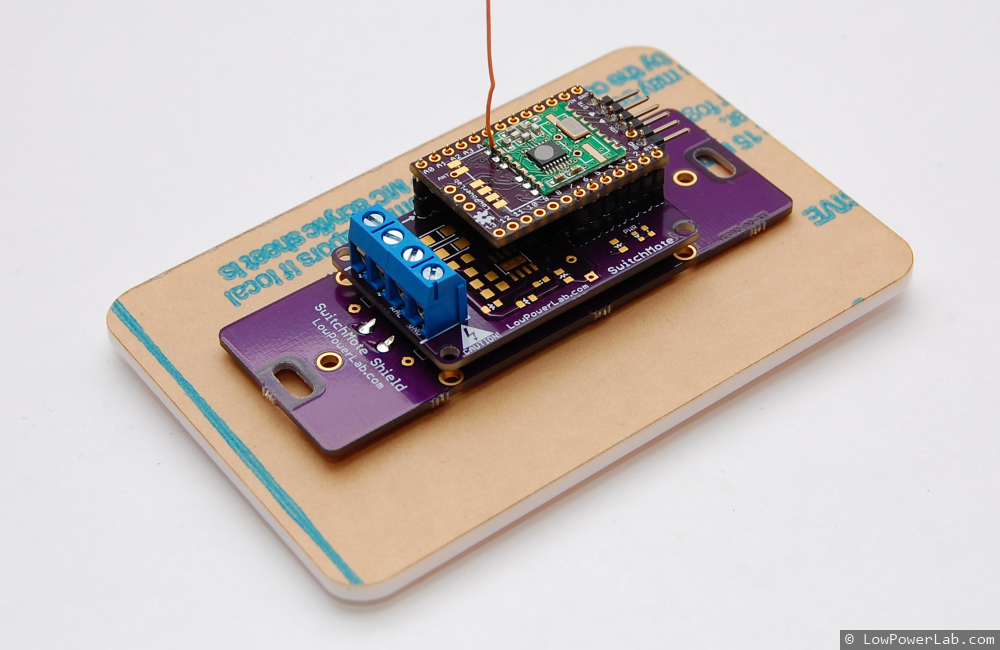
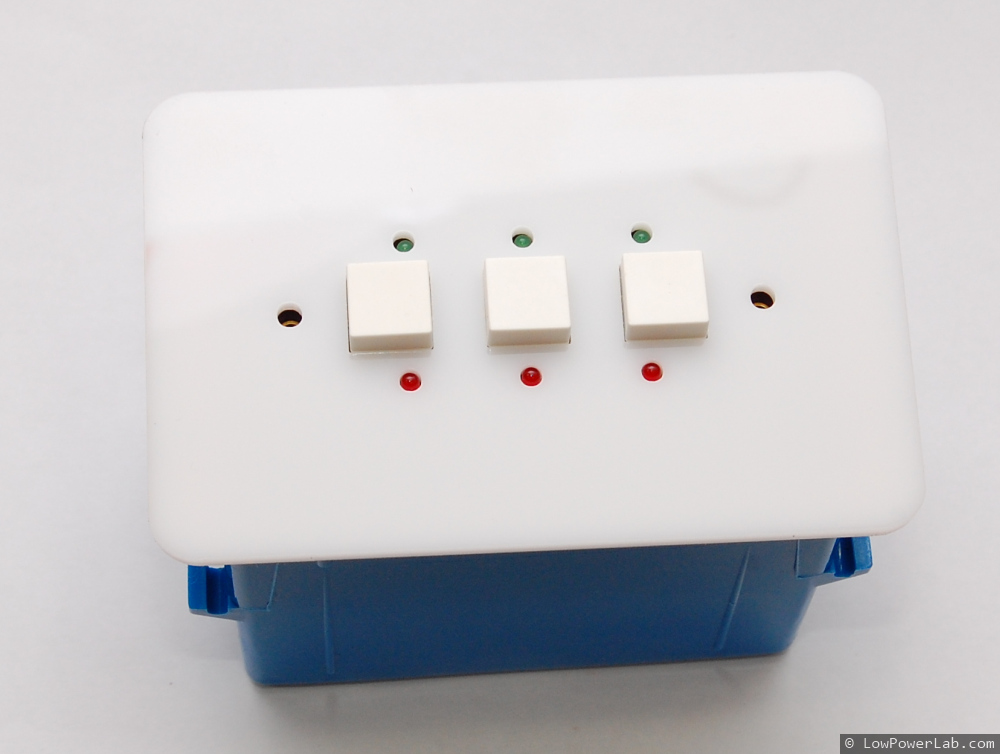
First and foremost I’ve spent a lot of time developing an integrated solution for SwitchMote. I want this thing to come to life and just be awesome, I think I’ve spent way too much time on it to just let it die. I now have another prototype including a shield with 3 user buttons and 2 LEDs per button, which can all be used in any way, or left unpopulated if only 2 or 1 buttons are desired for a light switch. The point of having multiple buttons is being able to control or synch with other SwitchMotes or … do anything else you want like say … interact with GarageMote. I’ve managed to get a cover plate also that will be mounted on the wall to cover the switch box. I used the same diffused white I laser cut for the MotionMote project. I like that diffused white a lot, but there’s many possible colors on inventables.com to choose from. For now I am continuing to develop this project, write code, adding some basic mains protection and getting all the physical engineering of this thing right. So far I’m pretty happy, it’s a pretty good improvement over the first prototype I had:
 |  |  |  |
Then I would like to get a kit ready for the motion sensor. A lot of people asked. There’s a lot more to getting this done than might be obvious. I think I have most parts ready but I still don’t have enclosures which have to be laser cut.
I’ve been looking for a good source for some low power LEDs, ones that only draw about 2mA and still fairly visible. Now I have them in the shop in 3 colors, red, green, yellow. I think these will be the only LEDs I will offer in the future since all my projects are targeting low power:

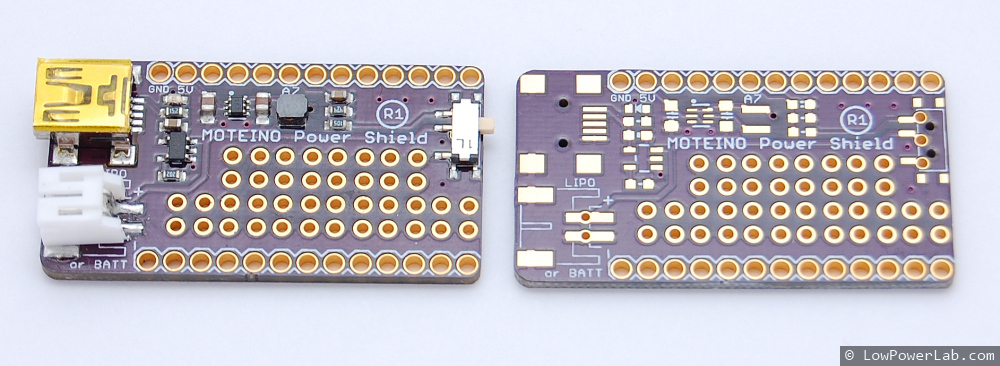
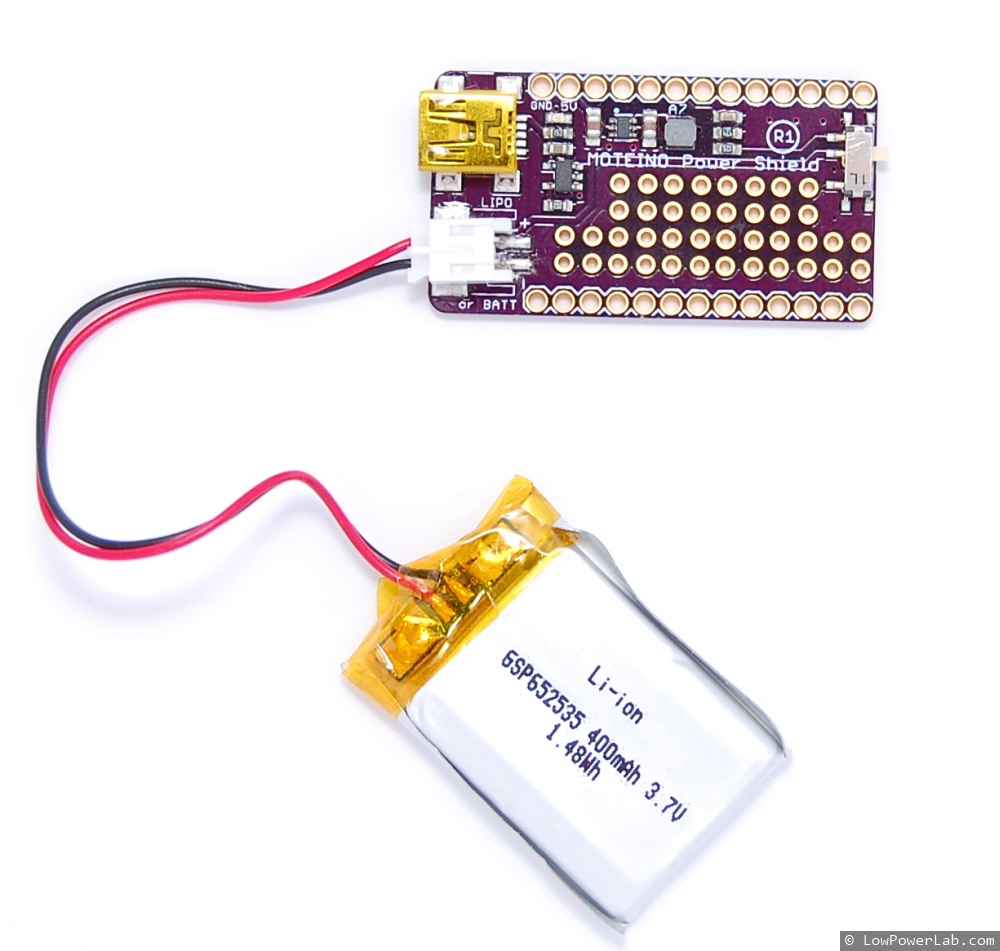
To complement MotionMote and to satisfy user’s requests, I’ve also been working on a shield for Moteino that would allow you to power your Moteino from a Lipo battery or from a single cell AA/AAA battery. As such, I came up with PowerShield, a little add on board that packs a bunch of features that should cover a lot of needs:
- Lipo battery charger based on the popular MCP73831 chip
- boost regulator to provide 5V to the Moteino and any other peripherals that might run on 5V only – can take anything from 0.7V to <5V
- battery monitoring circuit using the simple resistor divider + 0.1uF cap solution used in the MailboxNotifier project
- small prototyping area with 0.1″ spaced independent pin holes
- JST Connector TH/SMD footprint to connect the battery
- USB-mini connector to charge the battery or power the whole thing at 5V
- SMD/TH power switch to cut power from the battery
- small compact size with enlarged side header holes such that machined headers can be stacked compactly when used in tandem (the metal underside of the machined headers can sit inside the hole instead of on top of the PCB)
 |  |
PowerShield will allow a pretty compact stack of itself + Moteino + a small Lipo + PIR sensor in an overall quite small laser cut enclosure, even thinner/smaller than just the Moteino + 9V + PIR sensor that I’ve implemented before, that’s for those who want rechargeable and care to trim the extra 5-10mm fat of the 9V battery.
So that’s it for now. There’s still a lot of planning and sourcing and work to get all these ready for prime time. By posting these updates I hope to keep people interested and try to be open about in what’s coming, if all goes well.
I know you are working on a PS to fit in a single gang electrical box. Have you looked at or opened up one of the recently available duplex outlets with USB charging ports built in?
Lowes hardware has these: http://www.cooperindustries.com/content/public/en/wiring_devices/products/receptacles/commercial/_15a/nema_5_15r/usb_tr7745.html
Presumably they have solved the isolation issues, you may be able to get some ideas if nothing else.
To get 2A would take a beefy xformer. I’ve actually gotten one of those motion activated switched Chris mentioned above (http://tinyurl.com/kj6dpna) and tore it apart, there was no isolation or any fuse/varistor protection. But I will look into getting one of these USB plugs and opening it up to see what’s inside. Thanks for the tip!
Hey so I got one from HD with 2XUSB ports rated at 2.1A and opened it up. Not very surprising to find a transformer inside and a switching supply. Not sure this is really isolated though. Also protected using a MOV and 3A fuse. Overall significanly larger than my SwitchMote+button shield setup but then I don’t have an enclosure to put around it… still quite larger.
Not to add anything to your plate, but I just think this is an interesting idea. The hotel I am currently in uses them in the rooms to conserve power. It is SwitchMote + MotionMote mashup. http://tinyurl.com/kj6dpna
Of course this could be trivially implemented with using both, but if there was a way to interface the motion controller on top of the third button traces that would be megacool even if it has to stick out past the cover plate a bit.
Yep someone should try to hack one and add Moteino…
I have been on the move with nothing but a suitcase for the last year. I am finally in the process of settling into a home now as of yesturday and once I find one, build a work bench and acquire some basic tools I plan to order up some moteino’s! Ive been following your blog for some time now and love it compared to other Ardiuno compatible projects.
My biggest beef with the switch in my current hotel is that the restrooms single switch controls both the light and exhaust fan at once and turns them both off via the motion sensor timeout. Most of the time however I do not want the noisy exhaust fan on while in the restroom. This is a great motivation for me to make the two switchmote work with a motion sensor. Both the light and fan should work on independent timeouts.
Now getting it to fit into a single box is the challenge. If it was in a dual box w/ two traditional switches for the light/fan though it should be easy enough!
Can’t wait for the PowerShield to be available in the store. Any rough ETA ?
Hm .. not sure, but maybe only after the new year sometime. Maybe in late Jan or Feb.
Wow, all very cool additions.
The custom faceplate for the SwitchMote is OK but it looks quite different than other faceplates. How about making a custom SwitchMote insert for the large rectangular style faceplate/switch? Something like this:
https://dl.dropboxusercontent.com/u/9526908/SwitchMoteMockup.png
The LEDs in holes works and looks OK, but I wonder, how would it look if the LEDs were behind that milky plastic? A diffused glow might look nice.
What I like about this faceplate is it sits flat with the wall and allows the button shield to be mounted inside the wall (the blue switch box is not flush but is inset into the wall). I do however really like your idea, I think it’s a really great suggestion. Thanks for taking the time to photoshop that! But now those commercial covers with rectangular openings will not be able to mount on the button shield PCB since their screw holes are much farther out – they actually screw outside the switch box opening, where the metal casing of the switch overlaps over the wall just above the cutout in the drywall. So I got some samples from HD today to play with and do measurements. I’d have to expand the button shield to allow for that to happen. Which I might just do. In that case you could simply use your existing covers and I’d only have to provide a much smaller cover for the shield which would fit in place of the original commercial single rectangular switch. Also I need to expand all mounting holes to make it easier to use the same screws found in the commercial covers and switches… all good ideas for a 3rd gen SwitchMote prototype.
I see you points. Your faceplate keeps the design simpler and that’s important. As you noted, the ability to use standard faceplates means customers can maintain the same style of faceplate used throughout their house AND get all the cool Moteino features.
I am a mechanical engineer and would be willing to help out with the 3D CAD design. In fact I have a 3D model of the Moteino R4 almost done that I will share in the forums (I’m designing a custom enclosure for my Moteino).