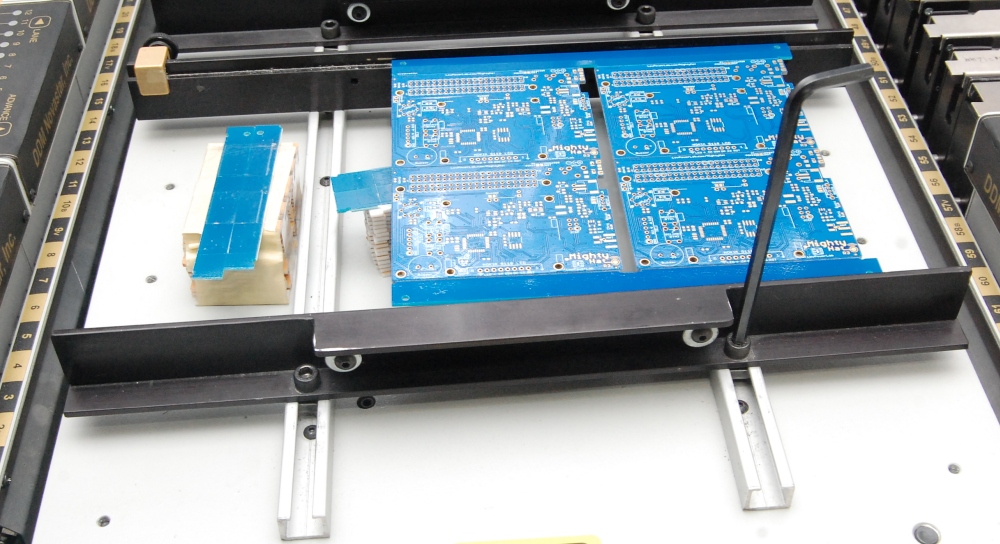
Over the past year or so I spent a lot of time designing and iterating over a new upgrade for my pick & place. The result is an upgrade kit that can be installed without modifying the original feeder. It enables the bank feeders in my DDM Novastar LE40-V to no longer have to peel back the cover tapes. That alone is a huge benefit. Watch this video of this upgrade in action, and see what other benefits this new concept brings to the L-BF-12 bank feeder.
Category Archives: pick and place
Pick and Place Nozzle Demagnetization
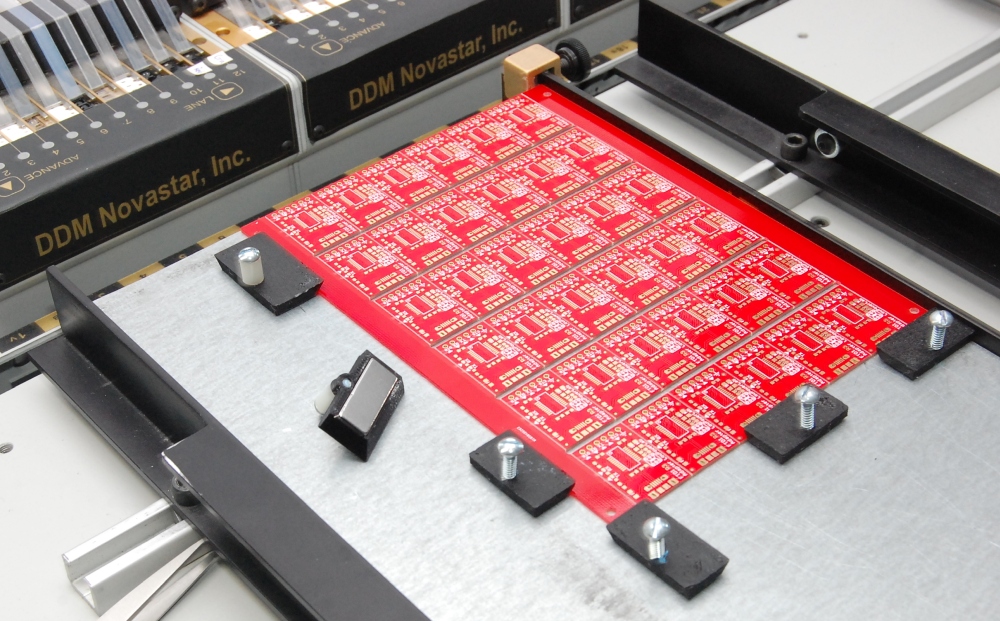
Since my LE40-V Pick & Place machine’s factory PCB holder is difficult to use, has no support, and is not well suited for V-scored panels, I had to get creative and use neodymium magnets on a metal plate to hold the PCB panels steady during placement.
This makeshift solution got me in trouble and it’s the second time I managed to get a neodymium magnet on the tip of an expensive SMD pickup tool. In my last post I showed how I upgraded from magnets to 3D printed magnetic brackets to make the PCB holding task easier and avoid this problem. Otherwise this would also not be a problem if I were’n using magnets, yes I know. Or if these tools were machined from a non-magnetic tooling alloy, such as what’s used in these excellent $5 CHP 3-SA tweezers. Don’t ferromagnetic metals get magnetized over time from extensive use anyway? I think it’s common sense to use a quality non-magnetic tooling alloy in such expensive tools which will last the life of the machine and won’t develop such problems.
The workaround I found to work and save the magnetized nozzles is shown in the video below. This method should work for other types of tooling.
3D printed magnetic holders for pick & place
 The LE40V pick & place PCB holders consist of 2 adjustable brackets that are meant to hold the PCB tightly on 2 sides (let’s call them TOP and BOTTOM) while the machine pounds the panel with parts. Typically you’d set the TOP side bracket to a fixed position that is perpendicular to the machine rails and only adjust the BOTTOM bracket depending on the PCB panel size, and hope you won’t snap your freshly solder pasted panel in half when you tighten it in. Also worth noting that by default there is empty space (ie. nothing) below the PCB for support, so I had to add some supports to stop panels from vibrating during placement. While this bracket is perfect for holding trays and very rigid panels, after only a few uses it becomes obvious this is a pretty terrible design for scored/thin panels which buckle under the 2 sided pressure and un/screwing hex nuts every time a new size panel goes in the machine gets old super fast. And yes – I snapped V-scored PCB panels to pieces on more than a few occasions thanks to this mechanism. Now being a super awesome customer oriented company, DDM Novastar will surely take note and improve the PCB holder immediately, maybe using the ideas below.
After some time I added a rigid metal sheet base to properly support panels in the machine during placement and that allowed using magnets to hold the panels instead, a no-brainer makeshift solution. That worked pretty well for a few years but strong magnets are not easy to handle. I thought maybe I can really fix this with a new magnetic bracket and shoot a video of making it happen. The result is below. I am quite thrilled with these holders that can secure the panels quickly and are a snap to adjust without overlapping much PCB area. Here’s a video showing how these work and how I modeled the parts:
You can find the models on Thingiverse or download a Zipped archive below.
Component sourcing and Mouser vs. Digikey Pros and Cons
This post is about mainly sharing the experience of a small maker business sourcing genuine components right here in the USA. Sourcing and stocking the right components in the right quantities is one of the finest balancing acts in a small electronic manufacturing business. That’s because keeping large stocks of parts has not only tax implications but also drains funds from other efforts faster than you may realize. If you’re a beginner and need some tips, here’s some experience that might save you a little sweat and hopefully a few of your hard earned dollars. I might will update this article in the future as more things come to be realized in this area of the business.
My main parts suppliers since LowPowerLab‘s inception were Mouser and Digikey. Both are great in their ways which I outline down below, but there have been some surprising downside quirks as well. Hey it’s a little hard to get motivated to write only about awesome things, usually the bad stuff triggers reviews. But I’ll try to keep this objective and informative. If both were great at everything then there would be no reason for competition or even having multiple suppliers. Monopoly is a bad thing in supply chains, and I hope these companies will continue to exist as separate entities and not eat each other in some monster acquisition deal.
I have mainly 2 types of orders. One type is the “small value” prototyping batch of components or small run custom batch for a client which I usually place at Digikey due to their more comprehensive offering. Even this can run into the lower hundred dollar range depending on the project I’m putting together, but the average is under $100. Then there is my normal run, what I call the periodic replenishing orders which are in the thousands of dollars range. Whenever I run low on certain parts, I place them in the cart, and they stay there until I’m ready to complete the order. It’s unlikely for me to use fast shipping, so I usually go with ground services. I even use USPS for the real low count prototype orders.
Before I get into my sourcing experience with these suppliers, let’s take a quick look at the pretty incredible state of affairs with respect to passive component sourcing in Q1/2018. So as a quick primer side story about parts sourcing – if you’re a maker you’re already familiar with the astronomical passives lead-time situation. Just the other day I was scrambling to find 0.1uF 0603 caps (which along with 0603 1K 10K resistors are the most popular and numerous parts in my designs). They nowhere to be found these days due to extreme factory lead times for new passive stocks. I ended up paying $210 this week for the last 15K reel of cheapest 0.1uF caps (normally <$20 for a 4K reel). Yup, it’s that bad!
Neither of these companies are directly at fault for this, at least not for the supply chain. But they control their dwindling stocks pricing of course that’s for sure, and why not make a buck while in this dire straits, right? This week I made the mistake of keeping some reels of basic passives in the cart for a day or so until I completed my order (at Digikey first then at Mouser when Digikey 1) doubled the price then 2) went from a comfortable 16-24,000 parts to 0 stock. No problem, Mouser doesn’t mess with pricing right? Then Mouser did it too, but too late for screenshots to prove it! I should have just bought those on the spot knowing everyone else is trying to buy them too. Don’t procrastinate silly!
Anyway let’s now go ahead and imagine a little fable here:
In general as companies (not necessarily these) get larger they tend to become more imperialistic, trusting their dominance on market share confidence and getting preferential with customers depending on their bottom line impact. Small customer care becomes secondary. Me and you are probably lost in the background noise of annoying small customers, more so the lower the order value (more overhead per order for less profit!). Say you bought a few different SMD resistors, some switches, whatever else small value components for your latest breadboard project.
You buy not-overnight shipping, place your order sometime in the morning and expect them shipped in cut tape or whatever part spec packaging, before the same-day shipping 8-9PM cutoff time, well in time to get it for your exciting weekend project you’ve been looking forward to. But hey wait – who cares about your $19 order value, when there’s real customers. Think someone will walk the warehouse 5 minutes to count and cut your 10x 0603 resistor tape then pack your $19 order by cutoff time just because your order came in early? Have a question or concern? Go away annoying fruit fly, we are having some difficulties fulfilling the unexpectedly large number of orders in the last day, we will get to your order after the real customers and our interests get served.
That fable is a little on the extreme. But it get’s pretty close to reality actually when it feels like it’s happening to you, again, then again, and again. Continue reading
MoteinoMEGA pick & place assembly
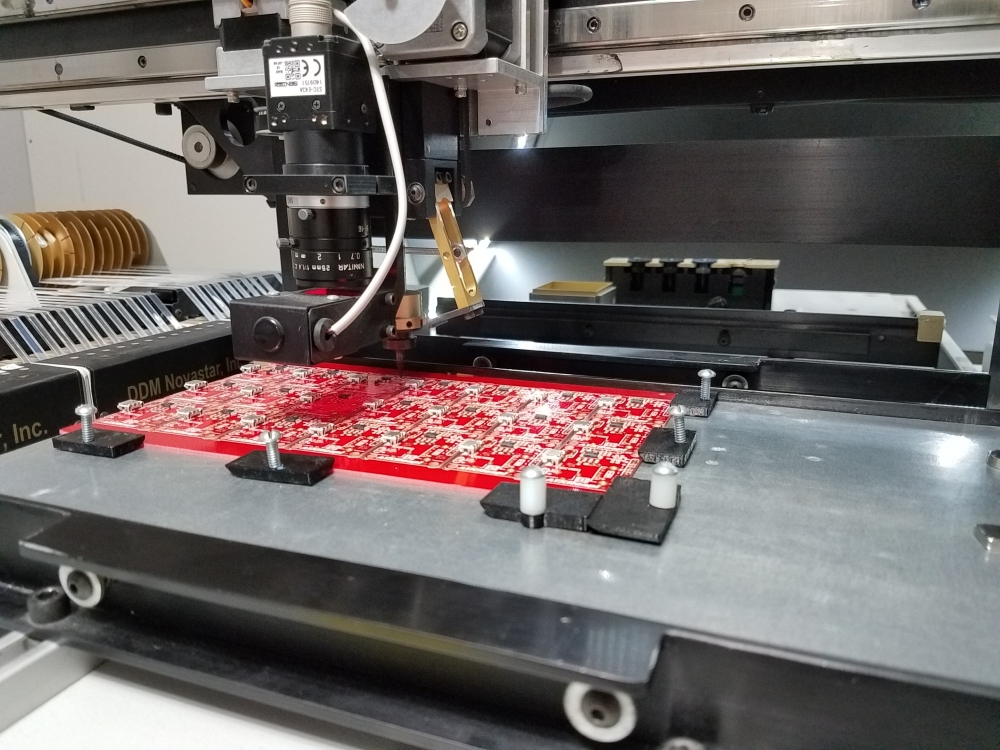
I spent yesterday evening assembling boards and I shot this video. It shows a closeup of the pick and place assembling a panel of MoteinoMEGAs. There are some other posts I wrote related to pick and place technology you may want to check if this is something new to you. The main things to take from this video are:
- effective CPH (components per hour) rating is affected in large by several factors like travel from pick position to placement position, travel speed, mechanical alignment in X and Y directions, vision alignment of each board, pick retries, dropped components, feeder reloading, feeder/tape jams, and many others.
- some components require a medium pick/travel speed and fine settle placement because they are “special” and may flip or get misaligned.
I hope I will have the patience and time to write a more in depth article and share my experience with this machine and more gotchas about picking and placing. This is still a very much entry level machine, but a semi-pro one, so I would still consider it a “real” pick and place since it can assemble a full panel with hundreds/thousands of parts without ever touching the machine.
Lasercut strip feeder for your pick & place
Got pick & place? Cool.
Got cut strips components but no strip feeders? No? Then this post is for you.
Problem: You need to assemble a small run of boards in your pick and place and buying full reels of parts makes no sense, instead you get a low count in cut strips. Strip feeders cost a lot, and they are not very special, just cold dumb metal. Of course, the manufacturer will sell you high quality feeders machined from aluminum/steel, but placing components from cut strips that already have pockets spaced evenly sounds like a very easy problem right? I mean you could just stick them on a cardboard with double sided tape and then teach the machine the first+last and it figures out the rest. That works but it’s a pain when you need to reload – you have to re-teach the machine since you won’t stick it exactly in the same place, you’re almost better off placing by hand.
Solution: So let’s make a strip feeder. I have lots of components that are less than a full reel (exotic resistors, transistors, crystals, caps, mosfets etc). Most of these are 8mm and 12mm tape, rarely 16mm. So it would be perfect to have a strip feeder that can be placed in a fixed position in the machine. To reload you just cut the pre-determined length, feed it through and align the first pocket to a marker on the side, reset component count for that row, and machine already knows where to continue, quick and easy. Continue reading
Pick and place – commercial options
 This post is a follow up to the “pick and place” category of articles, if I can call it that, I am trying to keep my promise of discussing some commercial pick and place machines. I researched for a good entry level (non DIY/kit) pick and place machine that could cover assembly needs without a lot of baby sitting. I am not talking about high end machines here, but something like what Adafruit or Sparkfun first got into, something suitable for a startup both feature/budget-wise. Even these entry level commercial machines are easily in the tens of thousands of $. You can easily spend twice what you’d pay for a brand new reliable car. I don’t know about you but when I think of spending that kind of cash I’d want to do my homework and know everything I can possibly expect from the product. This article is not meant to be exhaustive but I hope to cover most concerns and give a good idea what is important to look for, I can only wish there was a concentrated resource like this when I first started my research. It’s a long writeup but I hope those interested in the subject will appreciate the aggregation.
First let’s look at some of the things I learned along the way, and the features you may run into or want to consider. Then we’ll look at some of the available machines and discuss pros and cons. Continue reading
Pick and place – entry level options
Startups that manufacture electronics are faced with a limited set of choices when it comes to getting their hardware assembled. Each of the methods below have an array of possible approaches, some good some less so. I will try to cover what I’ve seen in my quest, hoping this will be a good overview of what’s out there. If I miss details or interesting methods please let me know and I will keep this list updated. This is part one, where I look at options of assembly without getting into a real commercial pick and place.
Doing it manually. Everybody started here, including Adafruit, Sparkfun and others. It’s great and fun at first and you learn a lot about surface mount technology (SMT) and also gain respect for how hard quality assembly really is. And we’ve seen countless ways people do this around the world. Some spread paste with a toothpick or dispense with a DIY syringe, then place parts with tweezers. This works for about 5 minutes before you go crazy, especially if you go smaller than 0603. Others laser cut mylar stencils to speed up the paste deposition. I etch my own stencils from soda can aluminum, this is fast and works great. For placement I’ve seen people make some fancy ball bearing jigs to help them move their hand, a bit better.
This is very cool and I almost did this myself but I think it’s overkill and a bit slow and … more expensive than it needs to be for what it does, but I can appreciate the effort of its creator. One advantage of this fixture is the ability to better hover over larger PCBs while placing. FWIW the maker even went as far as mounting a camera to help placing the parts, a nice touch, but looking at his video of it in progress the angle of the camera looks weird and looking away on a monitor when you work with your hands is what cuts the speed. Here’s another one of the same kind for reference. I do the same as these, only probably faster, with my aquarium pump pick and place (hold your laugh for a moment there) which cost me about $20 in parts, took about 30 minutes to make, and has full stereo vision – my eyes, can’t beat that for the price. I like to brag about this method not because I’m using it, but because it’s probably the best 100% manual method I’ve seen. Why you ask? I can do up to 7-800 CPH (measured!) with it on less complex boards. The only downside is obviously having to sit there all the time, with some neck and back strain, and the part alignment is less than ideal, but paste reflow really helps. I’ve assembled many thousands of PCBs this way, it works nicely and gets stuff done, but it’s not great. I wish I spent all that time developing new projects. So what is better than this?
PPM visit and Quad IVc/4000c pick and place demo
In an effort to deliver truly meaningful and comprehensive content, I will write a few articles about pick and place machines and SMT assembly, after many months of trial and error with various methods, in hope to help others who may want/need to get into SMT equipment and assembly. The focus will be on pick and place machines, my observations, what I learned in my prolonged research into pick and place machines over the last year, what some people say, what some companies end up choosing and why, what to look for, what to run away from, etc.
I first saw the article about the Quad IVc pick and place on Ohararp.com and was curious to see this machine up close.
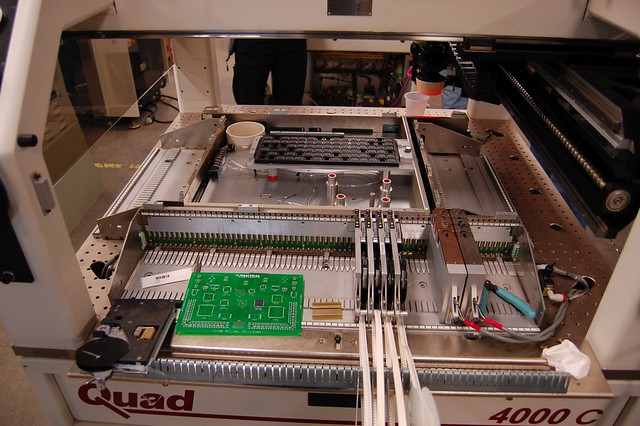
We visited PPM (Precision Placement Machines) some time ago and was able capture a few of the cool things we’ve seen there. This video shows a demo run and feeder setup on a Quad 4000c (Quad IVc upgraded to Windows 7).
I really took a long look at this machine and that’s why I took a day off to go out there (they are truly out in the country). Unfortunately there aren’t many resources on the web about these machines, at least not high quality pictures or videos, so I hope this will change that at least a little bit. The visit was very much worth it and the great staff showed us around and throughout the PPM facility. There’s too much to say about the visit and I hope to make some time to post more pictures later so here are a few more photos of the tour. Later I will expand on our observations on the Quad pick and place.
For now I will just post this video showing the Quad 4000c in action. It illustrates how the machine dispenses paste, places a range of components and finally how a feeder is setup:
Getting more serious about SMD production
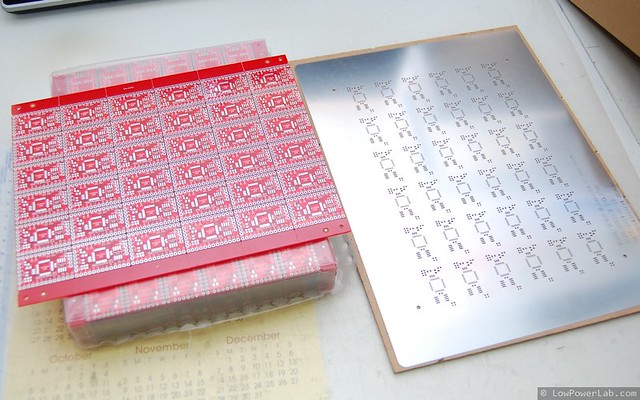
I’ve been doing all manual SMD assembly ever since I started Low Power Lab, and still do at this moment. I find it too hard to outsource assembly and too prone to some issues.
Anyway, in the beginning there were tweezers, a microscope, and a toaster over for reflowing. I very quickly realized that the tweezer method was insane to put it mildly, the only worst thing that I can think of is actually soldering everything with a soldering iron instead of using paste. Nonetheless the first ever Moteino batch was tweezer-microscope+reflow assembled. Then I figured out how to make metal stencils out of soda cans. That works beautifully, costs next to nothing, and the more you make the faster and better it gets, and those stencils never wear out, unlike mylar or other plastic stencils. It’s the closest you will get to real stainless steel stencils. But I could only spread paste on 1 piece and it gets tedious, watch this video of how I actually do it. Panelizing PCBs sounded a bit scary.
So finally I made the jump and panelized a batch of Moteinos recently. The panel has 2.5mm tooling holes that are spaced on a NxN cm grid (which would fit the Stencil8 tooling block), but quite frankly they could be spaced any way. The tooling holes match holes in the stencil such that the stencil alings perfectly with the PCB. The panels and stencils are made at Hackvana. I don’t have a tooling block because quite frankly I don’t think it’s needed (UPDATE: I actually had a MDF block milled – see this post for details). I drilled holes in some MDF using a 2.5mm drill bit (the thin sheets that come with the stencil are right size and perfect for the job), using the PCB to pilot the holes. Then 2.5mm steel tooling pins align the stencil with the PCB.
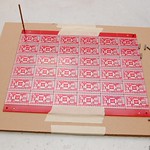 | 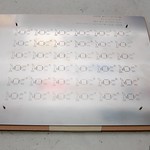 | 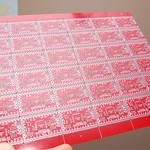 | 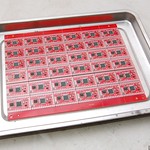 |
The time savings is significant, especially if multiple panels are assembled at once. I was reluctant at first and I was worried about the spacing between the PCBs and other things like that. But glad I did it and this is a first step towards more serious in house assembly. The v-scoring means the PCBs are snapped apart after reflowing, and the edges will be a bit rougher than the nicely routed PCBs I was used to. I do however snap the panels in 3 rows for easier SMD assembly with my pick and place vacuum tool. After reflow they are snapped into individual pieces. The panelization is done at the PCB fab for an extra fee.
The McMasterCarr parts for the pins and the drill bit are: here for the pins and here for the drill bit.
Next up: pick and place machine maybe? Haha.

